 We have extended the possibilities of SqlBak when selecting the backup destination so that now you can create a SQL Server backup to Azure directly from the browser!
Continue reading the article to find out how you can achieve this.
SQL Server backup to Azure with SqlBak
Now that SqlBak has added Azure as a backup destination, you can easily set this as the destination for your backups by doing the following steps.
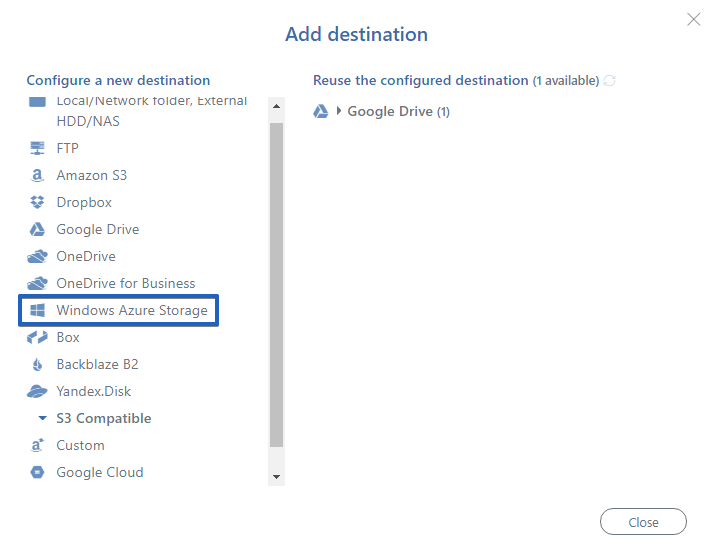
You go on your backup schedule and add a new backup destination or replace the one you already had.

In the pop-up that is displayed, you can see that a new option is selectable, the Windows Azure storage. Click this option in order to set up its connection settings.

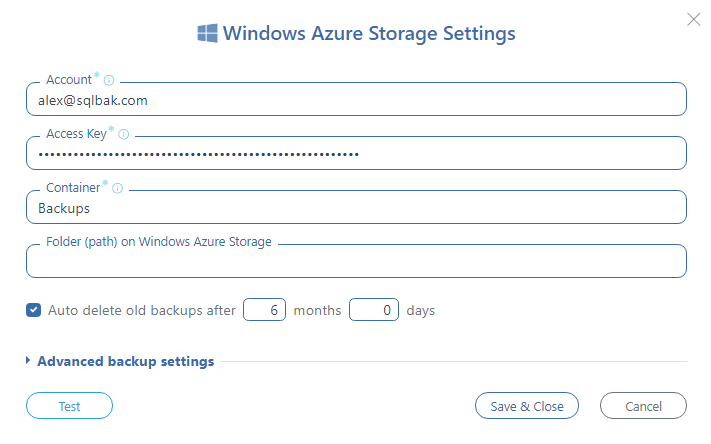
The above pop-up will be replaced with the below pop-up window, where you will have to input the name of your Azure account, the Storage Access Key(s), and the name of the Container in your Azure Blob Storage.
In case you encounter difficulties setting these up, you will conveniently find guidelines for these right above the fields, in the form of links that will take you to Microsoft’s official documentation pages.
 By pressing the Advanced Windows Azure Storage Settings button, you will expand the pop-up window and display a few more options that allow you to select what types of backups you want to be stored on your Azure account.
The Path input field will allow you to set choose a folder from your Azure Container where you want those backups to be stored.
Also, by setting an Auto delete interval on this screen, your backups will expire and be removed from your Azure storage after the period set.
And this is how easy it is for you to set up your Azure Storage as your backup location, right from SqlBak.
