SQL Server has a feature that allows you to save a backup immediately to Azure Blob storage, without intermediate storage on a local disk. This speeds up backups and also allows you not to worry about free space on the local disk for temporarily saving backups.
The principle of operation
SQL Server itself can connect to Azure, all you need is to generate an access token once and find Endpoint, then save them in SQL Server, and after that, you can specify the Azure Blob URL in the backup and restore commands instead of the path to the system files.
Where to find access token and endpoint
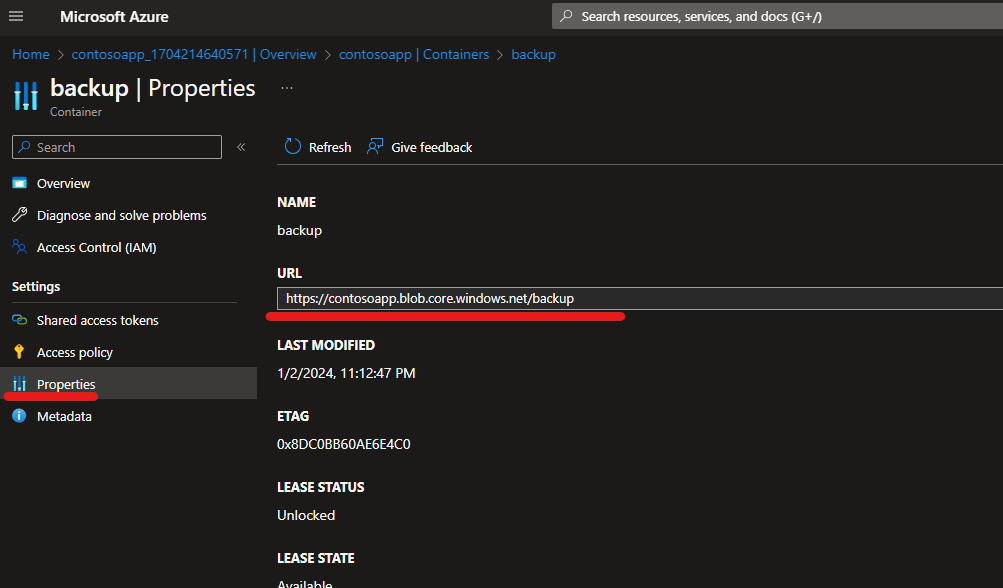
Endpoint can be found on the “Properties” tab of the container:
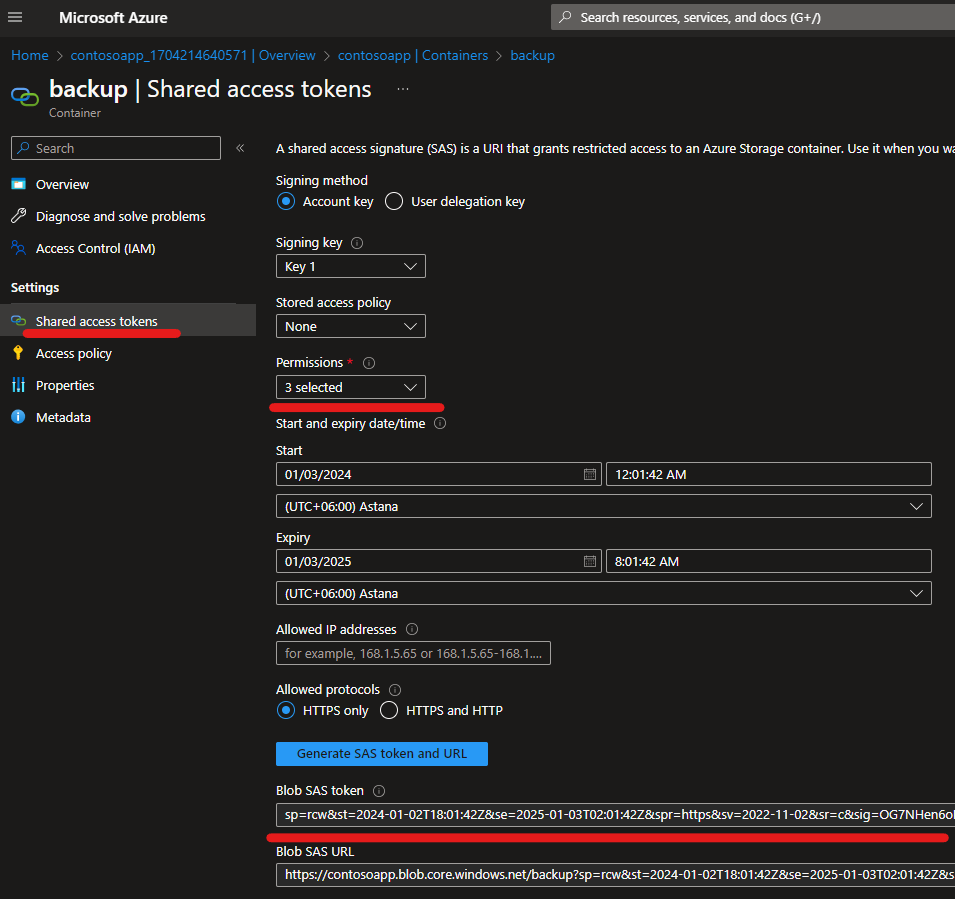
An access token can be generated on the “Shared access tokens” tab, make sure you indicate the validity period of the token, as well as grant permissions to write and create new files:
Save the access token in SQL Server once
The easiest way to do it is to use the following T-SQL command:
CREATE CREDENTIAL [<endpoint>]
WITH IDENTITY = 'Shared Access Signature'
,SECRET = '<SAS Token>'
For example:
CREATE CREDENTIAL [https://contosoapp.blob.core.windows.net/backup]
WITH IDENTITY = 'Shared Access Signature'
,SECRET = 'sp=racwdli&st=2024-01-03T10:50:16Z&se=2024-01-03T18:50:16Z&spr=https&sv=2022-11-02&sr=c&sig=YDH6FcucEyMu215YxbiA4A7as3acgeFJEXanvuO%2z3cZDg%3D'
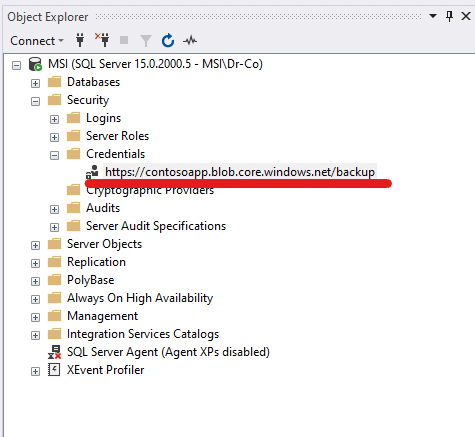
After this, the credentials will be available in the “Credentials” section (Object Explorer > Security):
You can also create credentials in the SSMS interface. This interface can be misleading, as it was originally intended for login/password and not access token.
T-SQL command to backup to URL
Once the credentials are created, they will be picked up on their own. The backup command doesn’t change much, the difference is that instead of TO DISK will be TO URL:
BACKUP DATABASE [<db_name>]
TO  URL = N'https://<storage_account_name>.blob.core.windows.net/<container_name>/<backup_file_name>.bak'
For example:
BACKUP DATABASE [temp_db_1]
TO  URL = 'https://contosoapp.blob.core.windows.net/backup/temp_db_1_backup.bak'
T-SQL command to restore from URL
The same thing with the RESTORE command simply specifies the URL for the file in the repository.
RESTORE DATABASE [<db_name>]
FROM URL = N'https://<storage_account_name>.blob.core.windows.net/<container_name>/<backup_file_name>.bak'
WITH REPLACE
For example:
RESTORE DATABASE [temp_db_1]
FROM URL = 'https://contosoapp.blob.core.windows.net/backup/temp_db_1_backup_2024_01_03_1754232221.bak'
WITH REPLACE
Backup to Azure Blob storage using SSMS
1. Right-click on your database in Object Explorer Task and choose Backup
2. In the Destination, choose backup to URL.
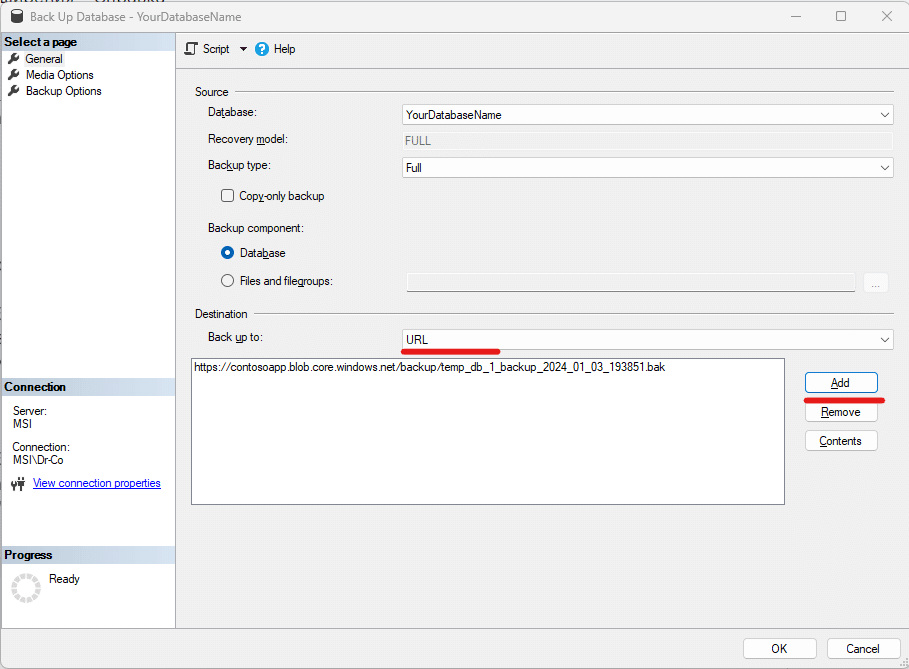
3. Specify the container, if the container has already been added to credentials, then you can select it from the list, otherwise, here you can enter the endpoint of the container, and in the Shared Access Signature field specify Access Token from Azure Portal.
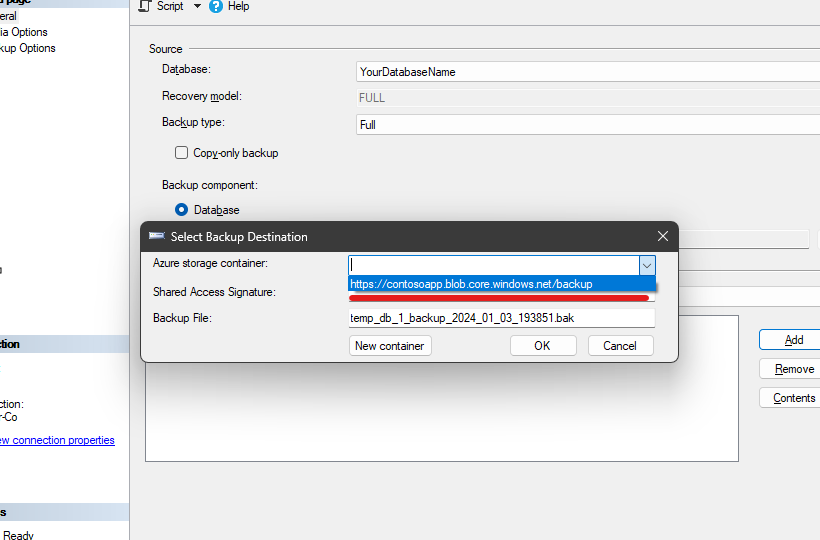
4. Click on “OK”
Restore Azure Blob storage using SSMS
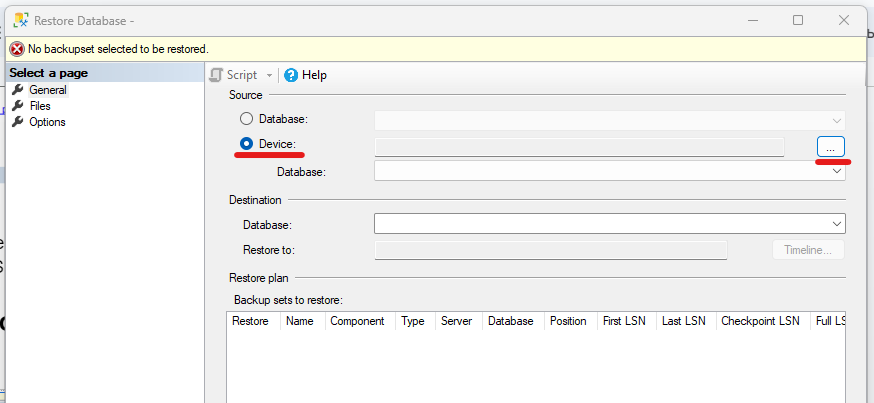
1. Right-click on your database in Object Explorer Task and choose Restore database
2. In the Source section choose Databases and click on the three dots
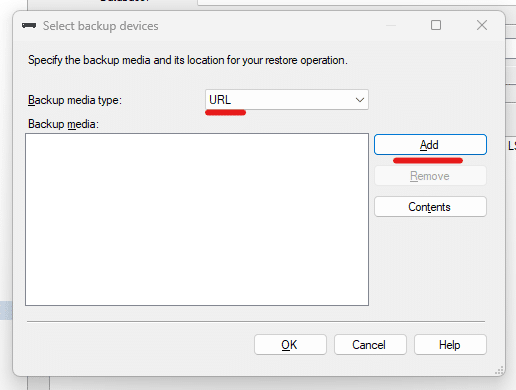
3. In the “Backup media type” parameter, select URL and click “Add”
4. Specify the Endpoint for the container and Access Token
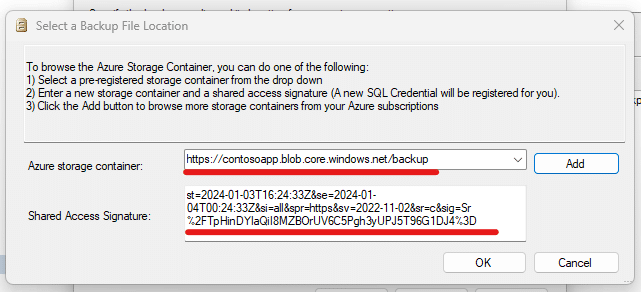
5. Open the container and select the backup you need. To find the backups here, note, to see the backups here, when creating a token, you need to select the List privilege.
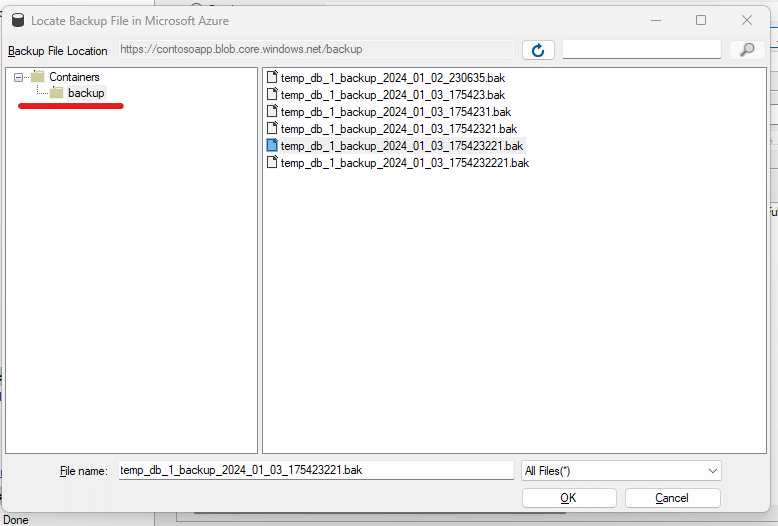
6. Click “OK” in all open windows
Useful features when creating a backup via URL
There are two ways to improve the performance of creating SQL Server backups in Azure Blob storage.
Backup SQL server database to URL with compression
You can enable the compression when creating a backup.
- The backup size will be in 2–3 times smaller
- The backup and restore operation will be fast since it is smaller
But there is a drawback
- Higher load on the server during backup creation
T-SQL command to backup to URL with compression
BACKUP DATABASE [temp_db_1]
TO  URL = 'https://contosoapp.blob.core.windows.net/backup/temp_db_1_backup.bak'
WITH COMPRESSION
The restore command is the same, the SQL Server itself will unpack the backup during the restore.
In SSMS, the compression option is enabled on the “Options” tab:

Backup database to multiple URLs
SQL Server backup can be made in several files at once. This allows you to better utilize the multitasking capabilities of the server and network.
- Backup is created faster
The drawback is obvious:
- Higher load on the server and network during backup creation
You can backup to 2-3 or even 10 different files at once. The optimal number is easier to find experimentally.
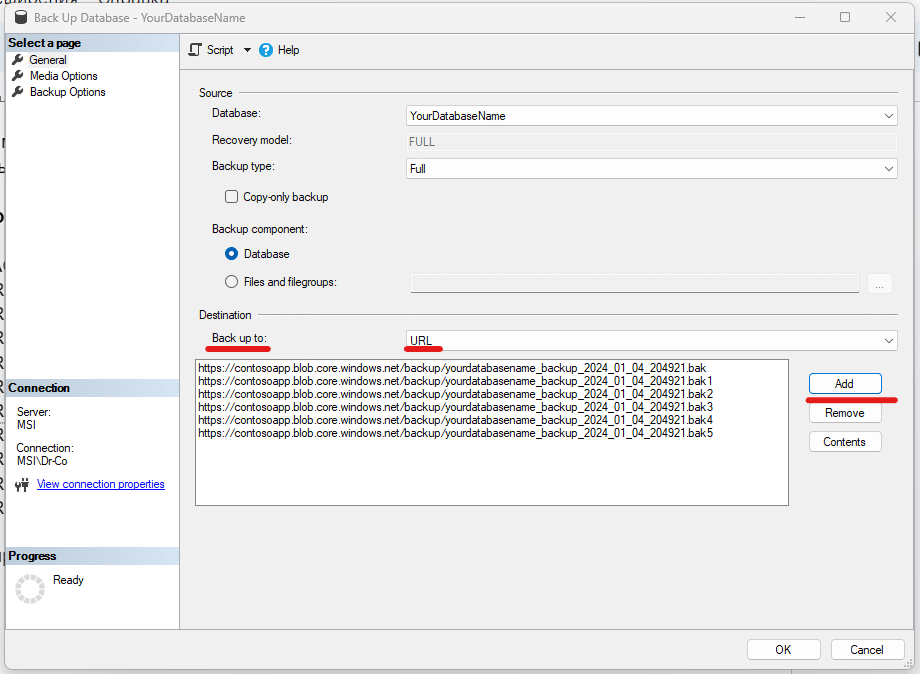
T-SQL command to backup to multiple files
BACKUP DATABASE [YourDatabaseName] TO
URL = 'https://contosoapp.blob.core.windows.net/backup/YourDatabaseName.bak',
URL = 'https://contosoapp.blob.core.windows.net/backup/YourDatabaseName.bak1',
URL = 'https://contosoapp.blob.core.windows.net/backup/YourDatabaseName.bak2',
URL = 'https://contosoapp.blob.core.windows.net/backup/YourDatabaseName.bak3',
URL = 'https://contosoapp.blob.core.windows.net/backup/YourDatabaseName.bak4',
URL = 'https://contosoapp.blob.core.windows.net/backup/YourDatabaseName.bak5',
URL = 'https://contosoapp.blob.core.windows.net/backup/YourDatabaseName.bak6',
URL = 'https://contosoapp.blob.core.windows.net/backup/YourDatabaseName.bak7',
URL = 'https://contosoapp.blob.core.windows.net/backup/YourDatabaseName.bak8',
URL = 'https://contosoapp.blob.core.windows.net/backup/YourDatabaseName.bak9'
In SSMS just append the file multiple times
Hi,
How are you?
I will start to do backups in Azure Blob Storage, but i have one concern. Is there any way to limit the bandwith usage?
If the backup operation uses all my network bandwith i will have problems.
Thank you.