NoSQL databases allow us to redefine the way we interact with data. However, data protection requirements remain the same as for SQL databases.
One of the main ways to protect your data is to back it up regularly. This article will help you protect your data for the most popular NoSQL database – MongoDB.
How to backup and restore MongoDB?
The mongodb-org package includes two utilities mongodump and mongorestore. To back up all your data and immediately pack it into an archive, use this command:
mongodump --gzip --archive=my-database.gz
To restore all the data in the backup, use this command:
mongorestore --drop --gzip --archive=my-database.gz
Please note that this command contains the –drop parameter. The restored data will be overwritten.
Minimal data protection solution.
In the simplest case, to protect your data you need to make a backup every 24 hours at night.
Create a directory where you will store your backups.
mkdir -p ~/mongo/backups
To schedule a regular backup run, enter
crontab -e
And add the following line:
0 0 * * * mongodump --gzip --archive=~/mongo/backups/my-database.gz
Then, a new backup will be created every midnight.
Even though the method described above is better than nothing, it has two critical drawbacks:
- The backup file is located on the same server as the database itself. If your hard drive fails, then not only can the database be damaged, but also the backup file.
- You only have one restore point. If you accidentally delete the critical data but notice it only after 24 hours, the data will have been deleted not only in the database but also in the backup.
What makes a good backup script?
A good script for a MongoDB database backup should include the following steps:
- Create a backup file with a unique name
- Compress it
- Transfer the file to another server
- Delete old backups
- Send email notifications about the script execution results
Preparing to create a script
To create such a script, you will need to install several utilities for email notifications.
sudo apt-get update
sudo apt-get install postfix mailutils
Rsync will help you transfer the backup to another server. But for this, you need to configure access to another server using an ssh key. In Linux, this is very easy to do and takes just two steps.
First, generate the key:
ssh-keygen
The utility will ask you to enter the file name and passphrase (optional). To leave the default values, just press Enter.
Then, transfer the public key to the backup storage server:
ssh-copy-id my-remoute-user@192.168.0.1

MongoDB backup script
At the very beginning of the script, you must specify the local backup storage, the address for email notifications, and the remote directory to which you want to transfer the backups.
set -x

# Local backup storage directory
local_backupfolder=mongo/backups

# Notification email address
recipient_email=my@gmail.com

# Number of days to store the backup
keep_day=30

# remote backup storage
remoute_backupfolder=my-remoute-user@192.168.0.1:/home/user/backups

gzfile=$local_backupfolder/all-database-$(date +%d-%m-%Y_%H-%M-%S).gz

#create backup folder
mkdir -p $local_backupfolder

# Create a backup
if mongodump --gzip --archive=$gzfile ; then
   echo 'Backup created'
else
   echo 'mongodump return non-zero code' | mailx -s 'No backup was created!' $recipient_email
   exit
fi

# Delete old backups
find $local_backupfolder -mtime +$keep_day -delete

# Local and remote storage sync

if rsync -avh --delete $local_backupfolder $remoute_backupfolder ; then
   echo 'Backup sended'
else
   echo 'rsync return non-zero code' | mailx -s 'No backup was sended!' $recipient_email
   exit
fi

echo $gzfile | mailx -s 'Backup was successfully created' $recipient_email
Above is a script that creates a compressed backup of all data on the MongoDB server, saves the backup to a local folder, deletes old backups, and runs rsync to transfer data to another server.
If everything runs without errors, an email notification will be sent stating that everything is fine. If an error occurs, the email will indicate the problem.
You can also schedule regular backup script execution through cron.
crontab -e
And add the following line:
0 0 * * * bash ~/scripts/mongodb-backup.sh
SqlBak
Creating a bash script is not the only way to automate backups. An excellent alternative to bash script is a cloud backup service – SqlBak.
SqlBak creates a backup, compresses it, encrypts it, transfers it to the selected cloud storage, deletes old backups so that the storage does not overflow, and then sends an email notification about the results of its work.
The service is quite easy to set up, but its main advantages are revealed when it comes to managing backup automation across several servers at once.
It also supports MySQL, PostgreSQL, SQL Server databases. The service works not only on Linux, but also on Windows and even Raspberry Pi. The supported cloud storage list is quite impressive: Local/Network folder, External HDD/NAS, FTP, SFTP, Amazon S3 and S3 compatible, DropBox, Google Drive, OneDrive, OneDrive for Business, Azure Storage, Box, Backblaze B2, and Yandex.Disk.
Installation and connection
You can install the application using the standard operating system package manager. You can find instructions for installing and registering the package here.
Follow this link to install SqlBak app on Linux.
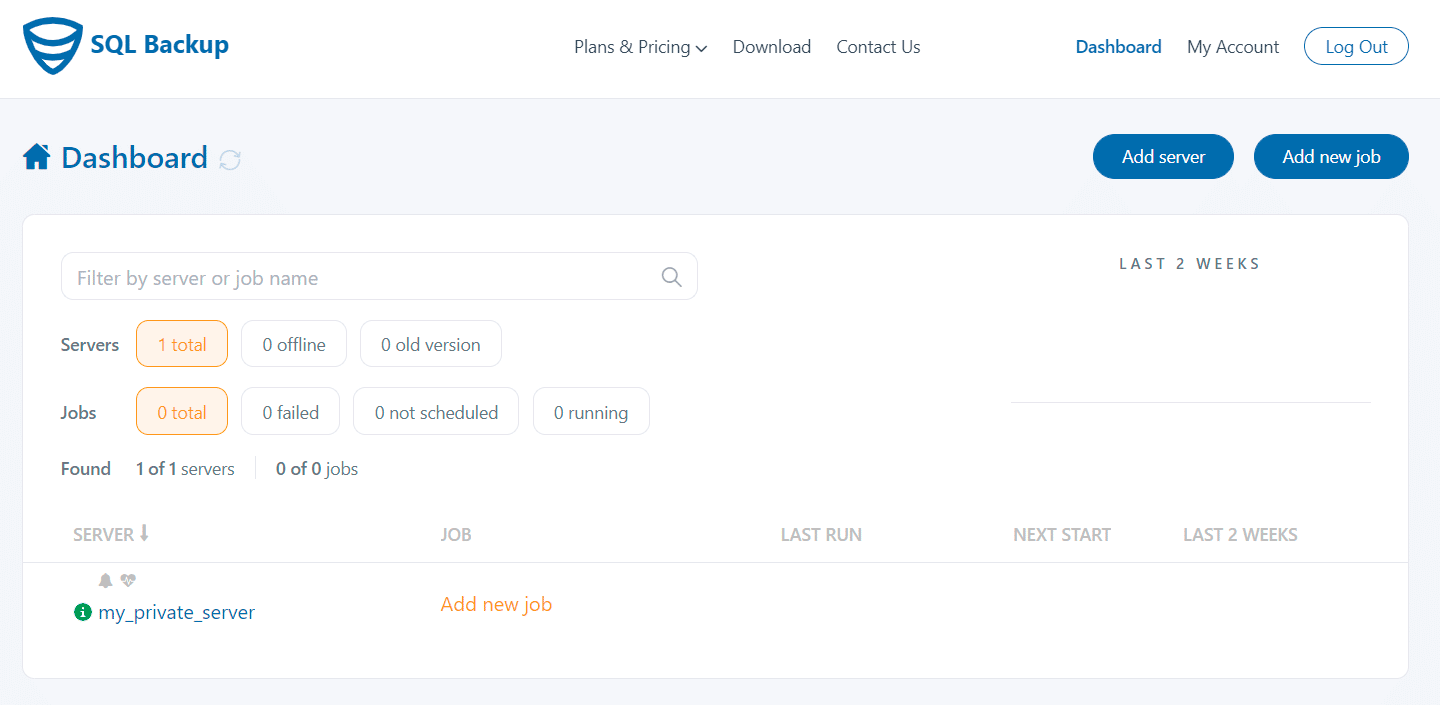
After successful registration, your server will appear on the Dashboard page.
The last step in the application setup for the console is to add the connection. The connection can be added as follows:
sudo sqlbak --add-connection --db-type=mongo

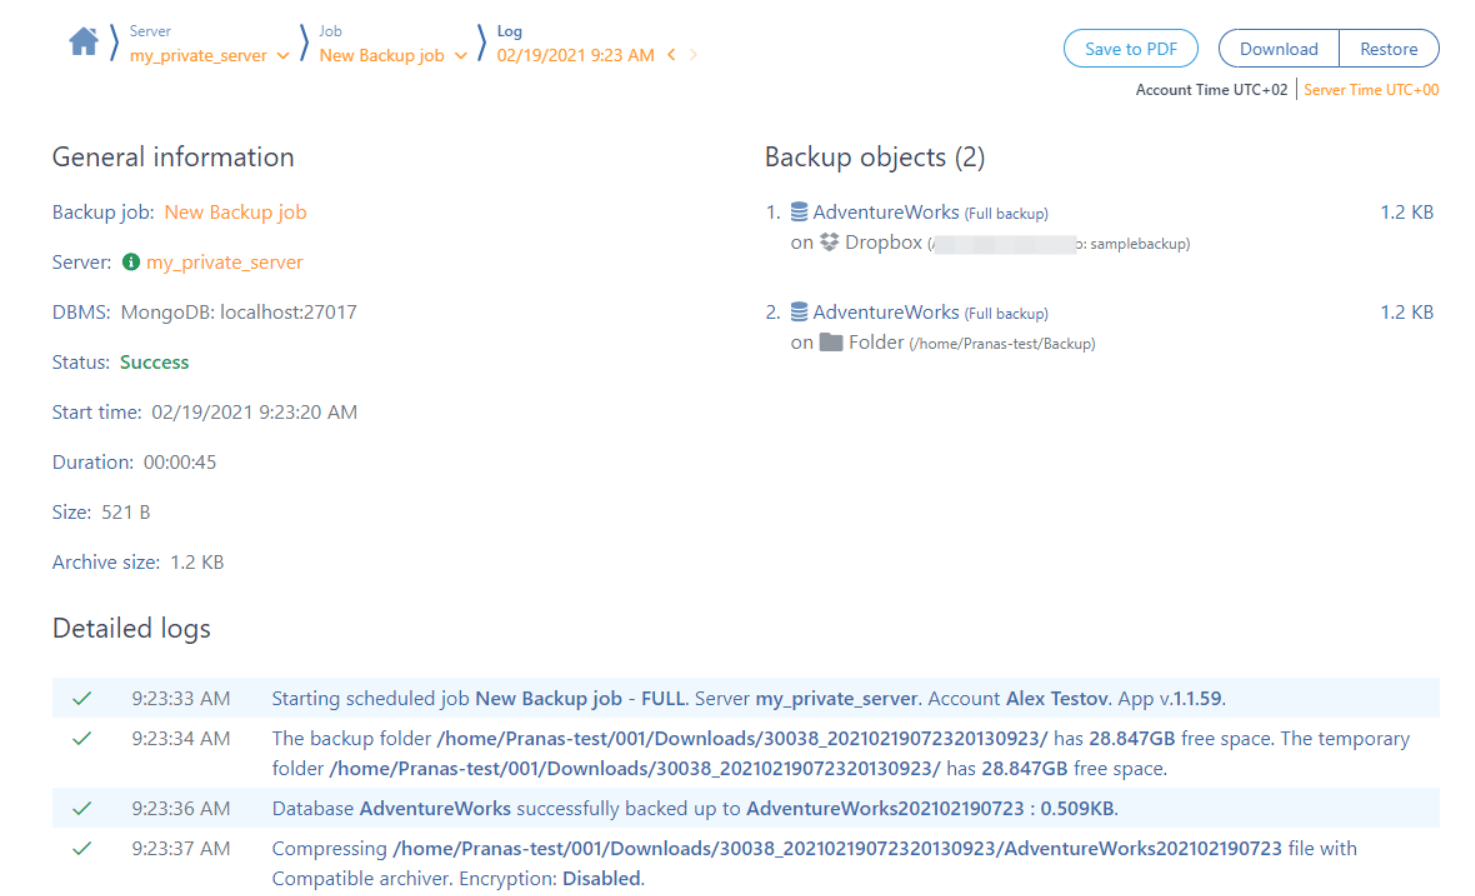
To create a new job to back up your databases, go to the Dashboard page and click the “Add New Job” button. Then, check the settings and click “Create Job.”
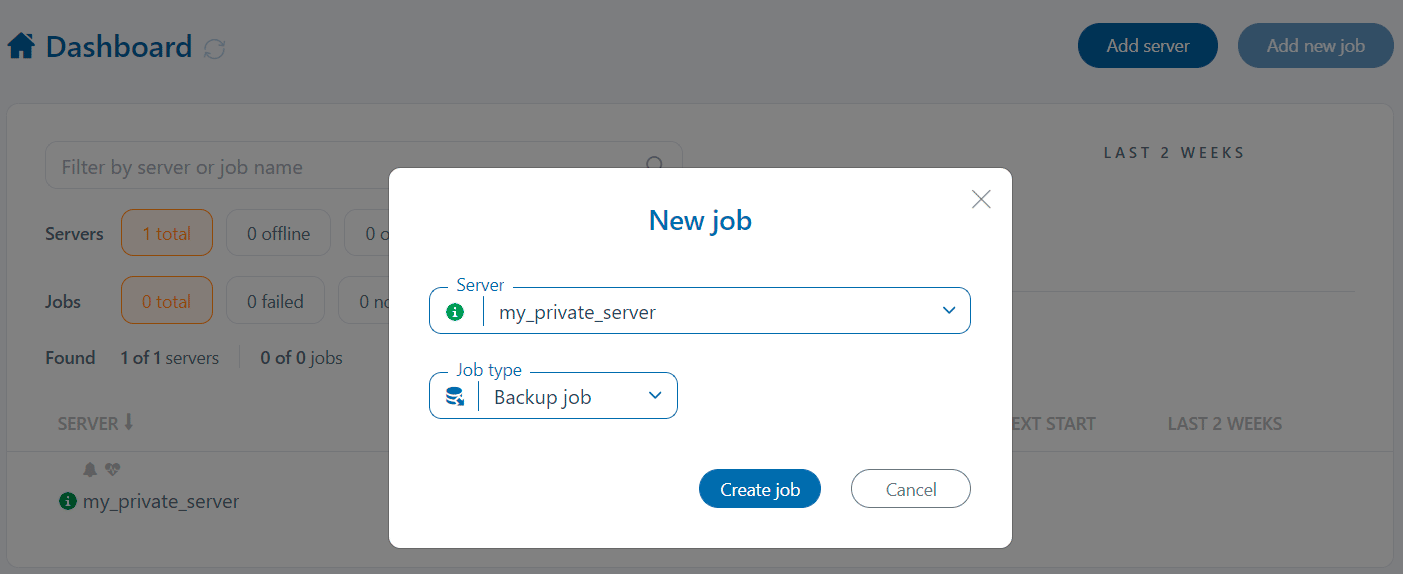
After that, the job setup page will appear where the first two steps will be automatically configured.
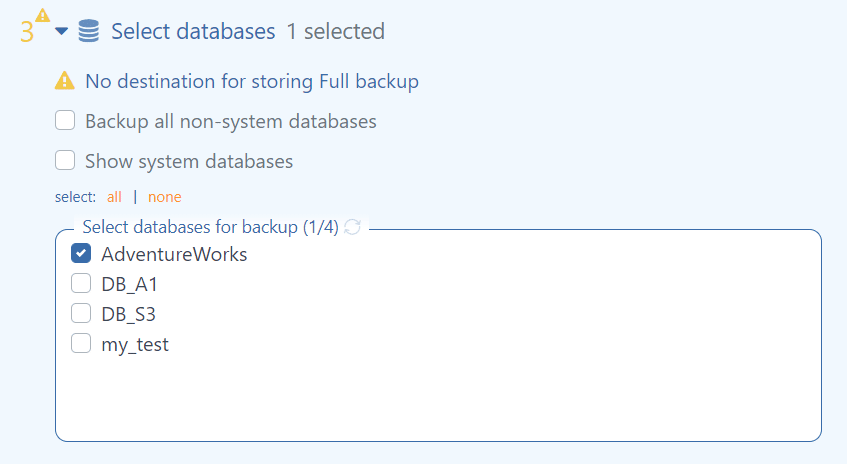
Go down to the “Select Database” section and select the databases you want to back up. You can also use the “backup all non-system databases” option.
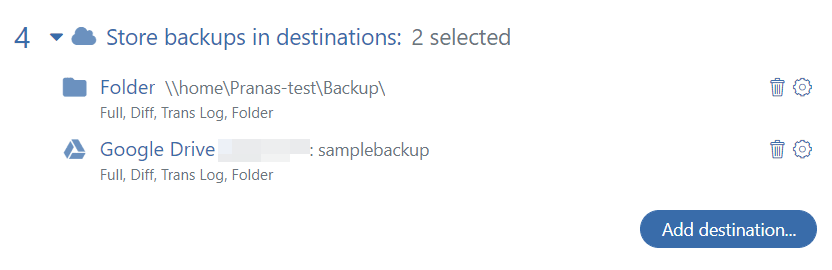
The next step is to choose where your backups will be stored. Go to the “Store Backups in the Destination” section and select one or more locations to store your backups. It can be Local/Network folder, FTP, Amazon S3, GoogleDrive, DropBox, Azure Blob Storage, or OneDrive.
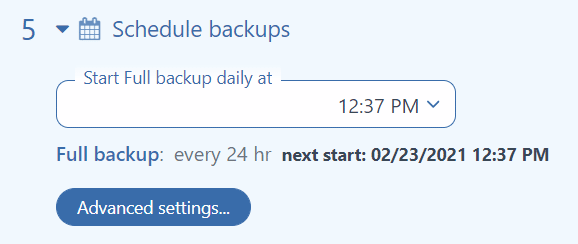
Now is the time to set up your backup schedule. In the “Schedule Backups” section, you can set the time you need or go to Advanced settings and specify custom launch settings as in cron.
The “Send Email Confirmation” section allows you to configure the receipt of email notifications for job success or failure. You can specify several email addresses separated by commas and test the settings by clicking the aircraft in settings.

Those are all the basic backup settings. In addition, you can find such useful options as: “Execute After & Before Scripts,” “Encryption,” and “Backup Folder.”
With SqlBak, you can also restore your backups to another server as soon as you finish creating them. Just add the appropriate settings in the “Restore Tasks” section. This option is handy if you need an up-to-date database for tests.
To save all job settings, click the “Save & Exit” button at the very top of the page.
The job will start according to the specified schedule, or you can click the “Run Now” button to start right away.
Bottom line
Data is an important part of any business. Therefore, damaged or corrupted data can lead to substantial financial losses or a complete shutdown. On the other hand, if you have a backup system in place, then all the failure consequences will be reversible.
To always have a life-saving backup at hand, you need to do it regularly. It can be done using the bash script as described in this article or by using the SqlBak service.