Microsoft SQL Server 2008 (MSSQL 2008) and its updated version, SQL Server 2008 R2, are very reliable database systems, and even today many businesses still use them despite being unsupported by Microsoft. It’s a common approach—if it works, don’t touch it. Moreover, upgrading to a newer version of SQL Server requires purchasing a relatively expensive license.
In this article, we will discuss how to perform backups and restores for MSSQL 2008, how they differ from those in newer versions of SQL Server, and how to migrate SQL Server 2008 to a later version using backups.
- Step by step backup SQL Server 2008 database via SSMS
- Step by step restore SQL Server 2008 database via SSMS
- Step by step backup SQL Server 2008 via SqlBak
- Step by step restore SQL Server 2008 via SqlBak
Differences between SQL Server 2008 backups and 2022
The main differences in backups are as follows:
- Backup encryption is not supported.
- There is no direct ability to backup to the cloud using the
BACKUP .. TO URLcommand. - Backup compression is only available in the Enterprise edition, while availability in the Standard edition appeared starting from the 2008 R2 version.
There are also other differences, such as some parameters that appeared in later versions, or support for differential backups of filegroups, but a detailed discussion goes beyond the scope of this overview article.
Via SQL Server Managment Studio (SSMS)
SQL Server Management Studio is compatible with older versions of SQL Server, so you can use the latest version of SSMS available on the official website.
Step by step guide how to backup SQL Server 2008 database via SSMS
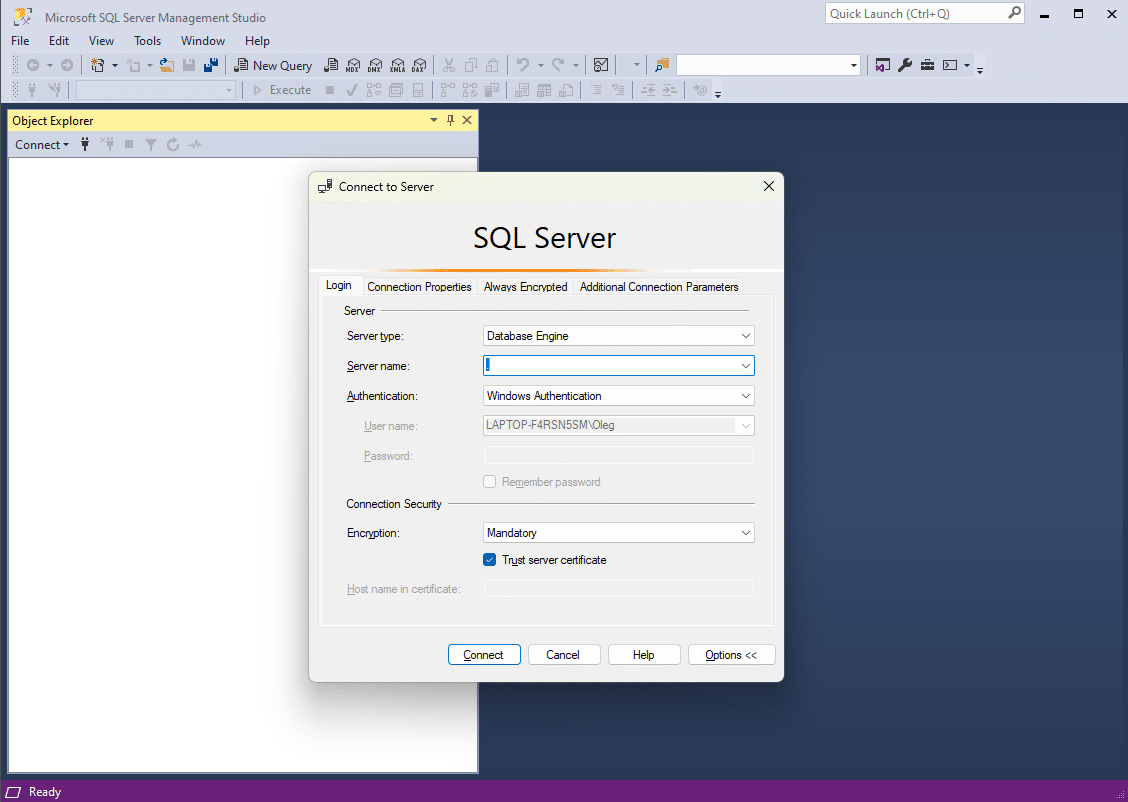
Step 1: Open SSMS and connect to your SQL Server
Launch SQL Server Management Studio and connect to the SQL Server instance hosting the database you want to backup.
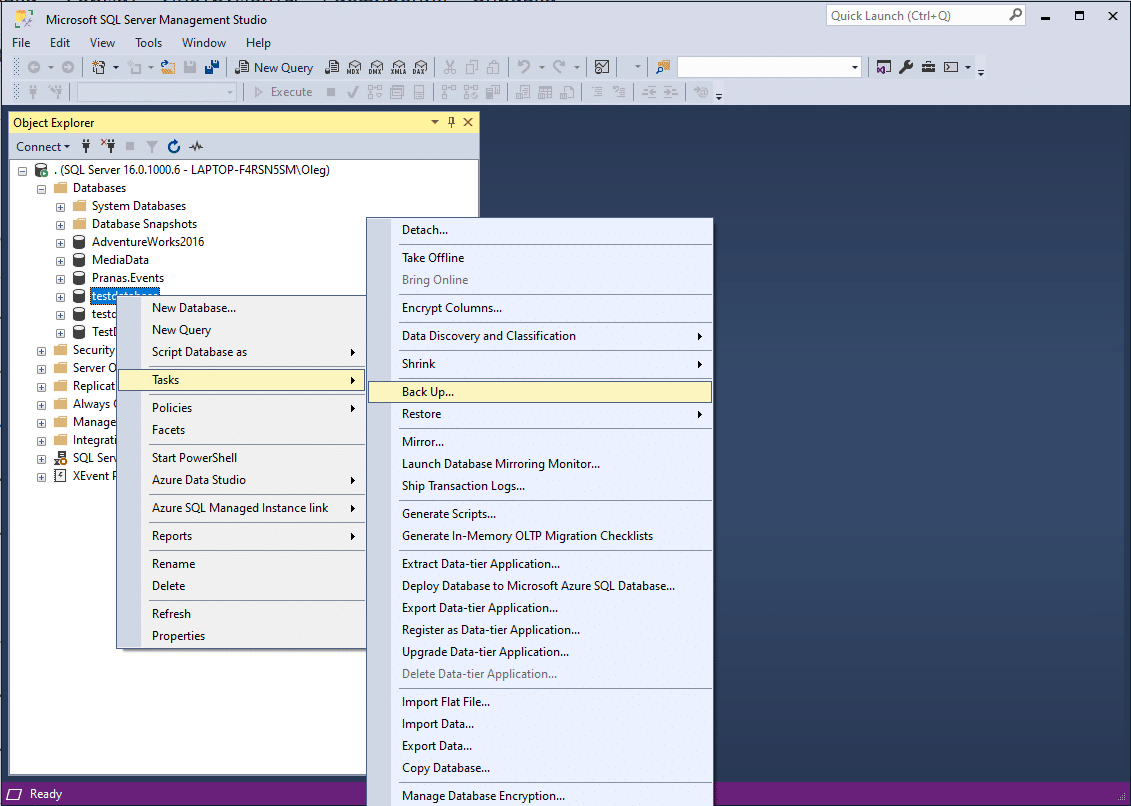
Step 2: Initiate the backup process
- In the Object Explorer, expand the Databases node.
- Right-click on the database you want to backup and select Tasks > Back Up.
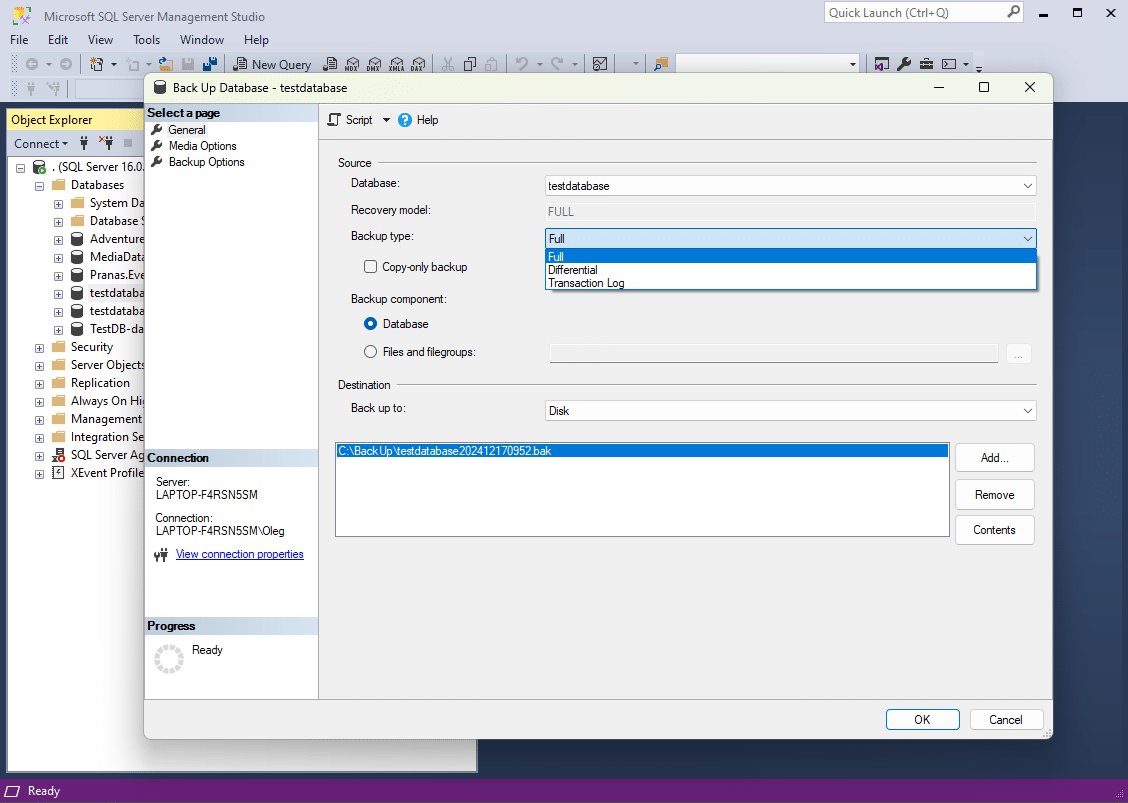
Step 3: Configure the backup settings
- Backup Type: Select the backup type: Full, Differential, or Transaction Log.
-
Destination:
- Under the Destination section, click Add.
- Specify the location where the backup file will be saved, e.g., C:\Backups\YourDatabase.bak.
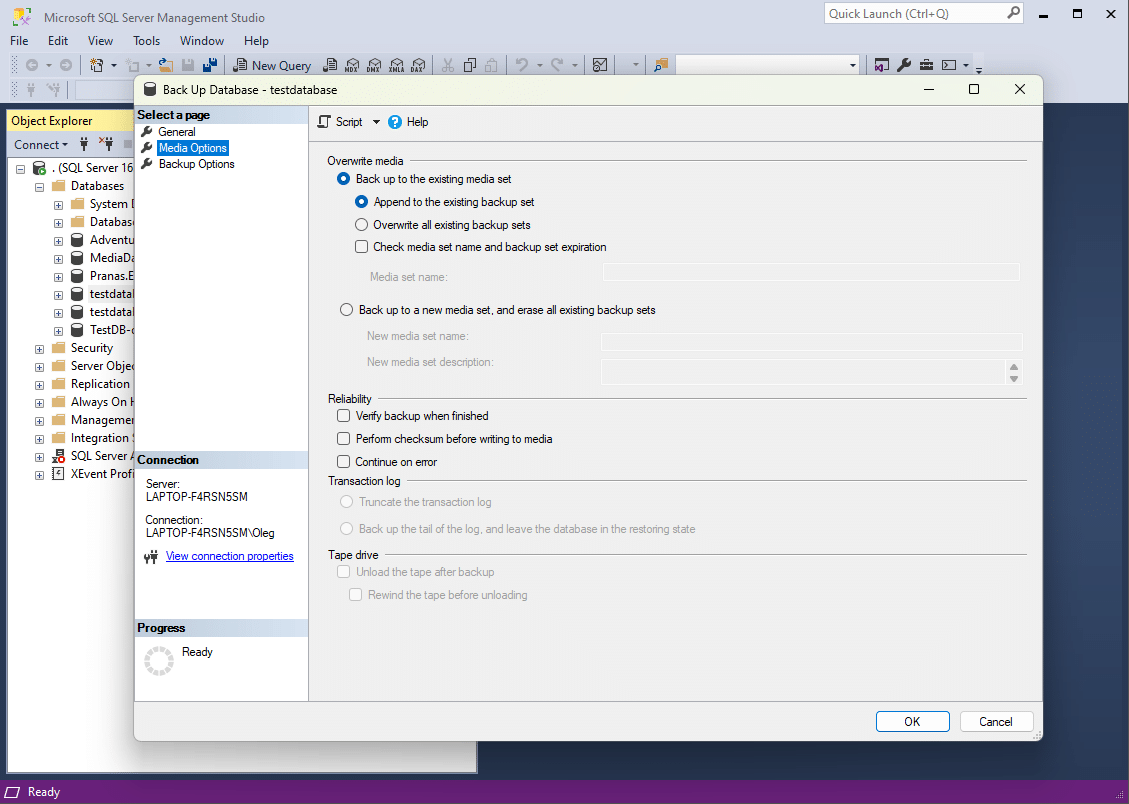
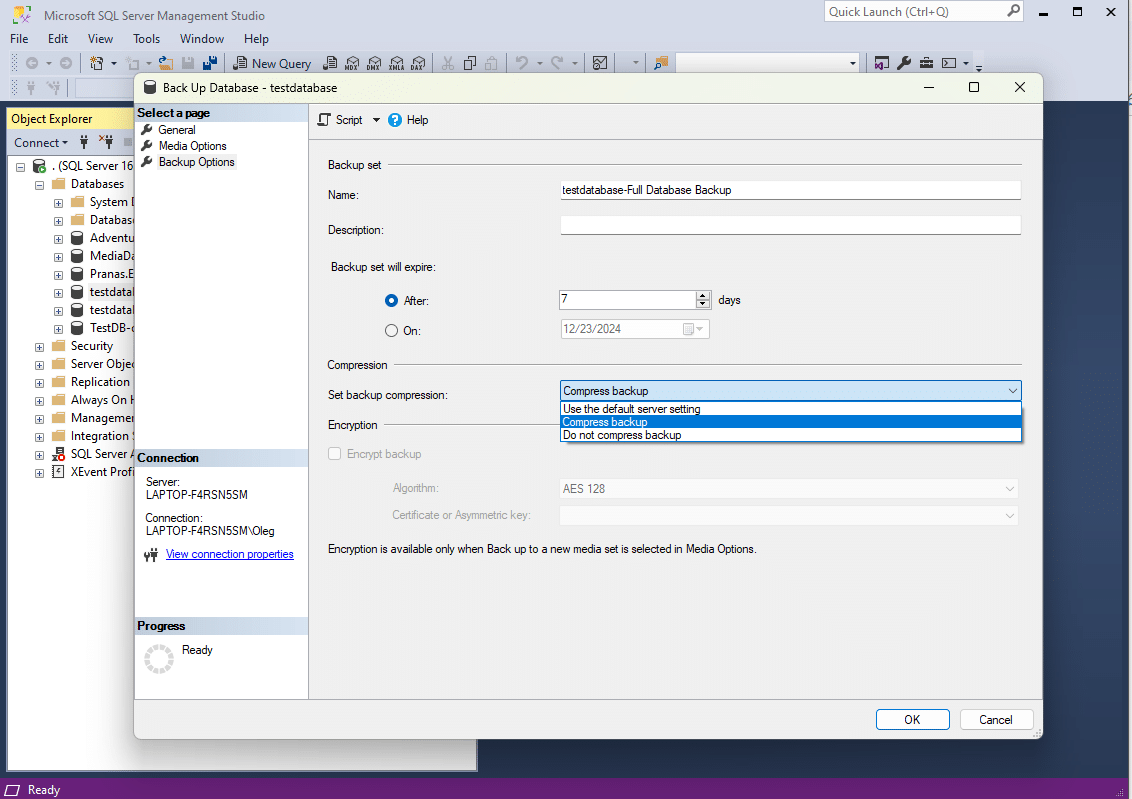
You can also set Media Options and Backup Options to customize your backup process, such as:
- Backup Verification: Ensures the backup file is valid.
- Compression: Reduces the size of the backup file.
- Overwrite Options: Decide whether to append to existing media or overwrite it.
- Retention policy: Specify how long backup files should be retained before being deleted automatically.
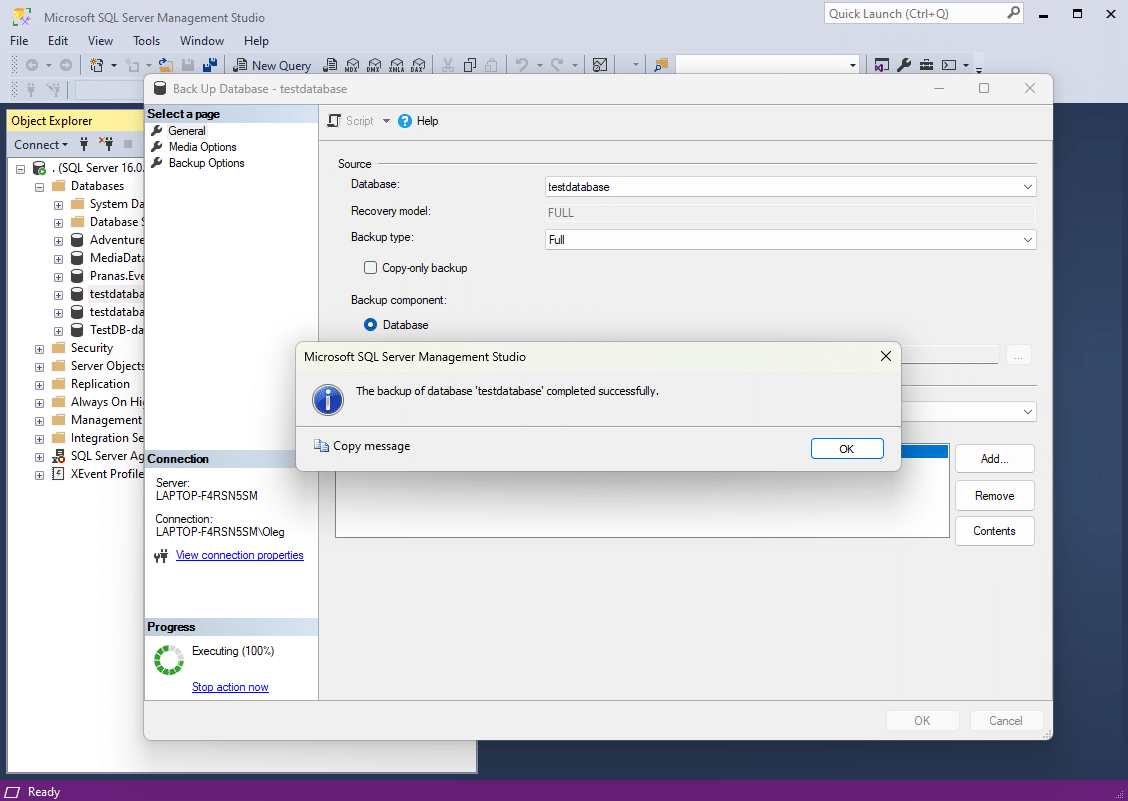
Step 4: Execute the backup
- Review the backup configuration and click OK to start the backup process.
- Once the backup completes, you’ll see a success message.
Step by step guide how to restore SQL Server 2008 database via SSMS
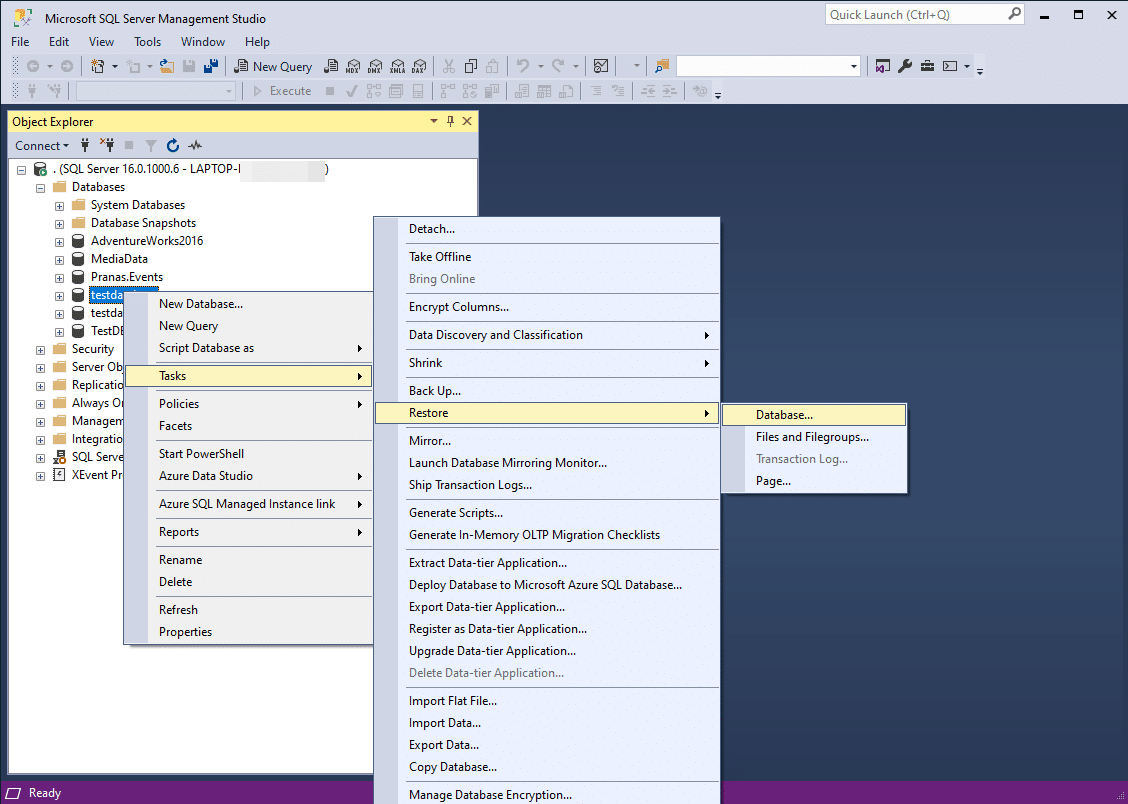
Step 1: Initiate the restore process
- In the Object Explorer, expand the Databases node.
- Right-click on the database you want to backup and select Tasks > Restore > Databases.
Step 2: Configure the restore settings
1. In the Source section, select the appropriate option for where you want to restore from:
-
- Database: Select this option if you’re restoring from an existing database within SQL Server.
-
Device: Choose this option if you’re restoring from a backup file (usually
.bak). Then, click the Add button to browse for the backup file.-
Browse for Backup File: Navigate to the location of the backup file, select the
.bakfile, and click OK.
-
Browse for Backup File: Navigate to the location of the backup file, select the
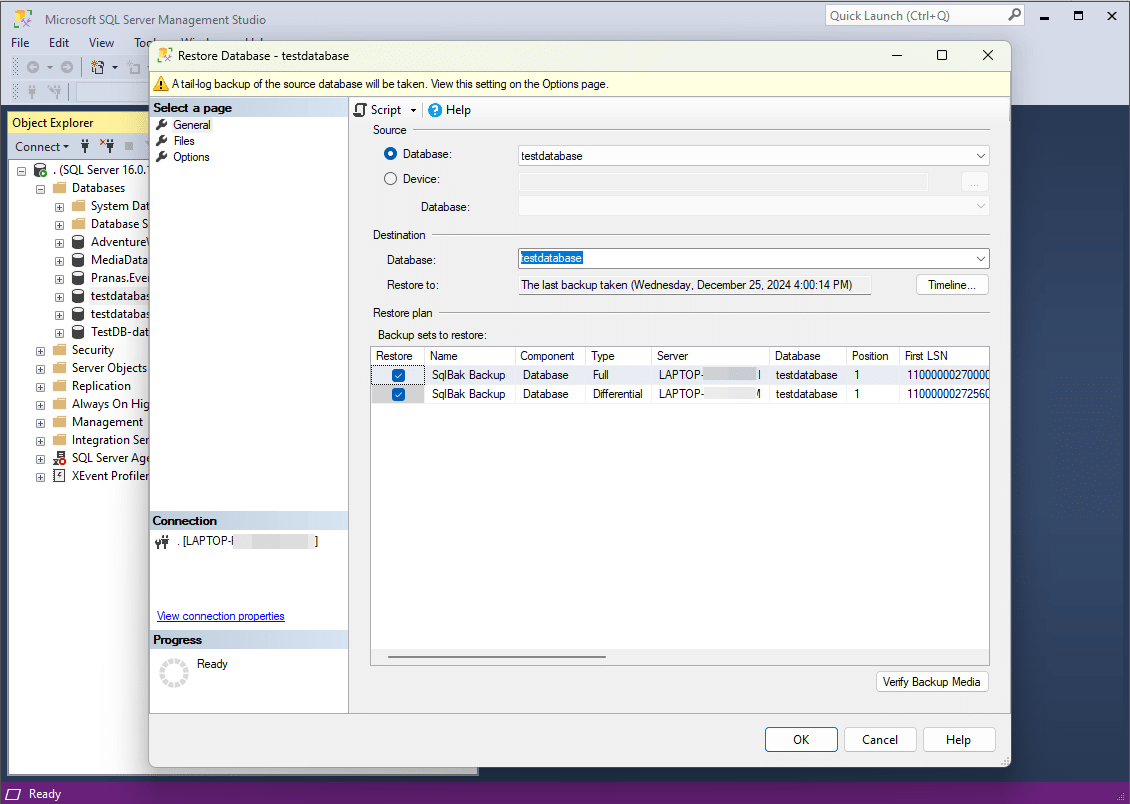
2. In the Destination section, specify the target database for the restore:
-
- To Database: If you are restoring the backup to an existing database, select the database from the dropdown list.
- New Database: If you want to restore to a new database, enter a new name in the To database field. The restore will create this new database and restore the data into it.
3. In the Restore Plan section, you can select the specific backup sets you wish to restore. Depending on the type of backup, you may need to restore in a certain order:
-
- Full Backup: Start with the full backup.
- Differential Backup: If there was a differential backup after the full backup, select it next.
- Transaction Log Backups: If you have transaction log backups, restore them in the correct sequence (starting from the oldest to the most recent).
Step 3: Choose restore options
In the Restore options section, select the necessary options, such as:
- Overwrite the existing database (WITH REPLACE): Select this if you want to overwrite an existing database.
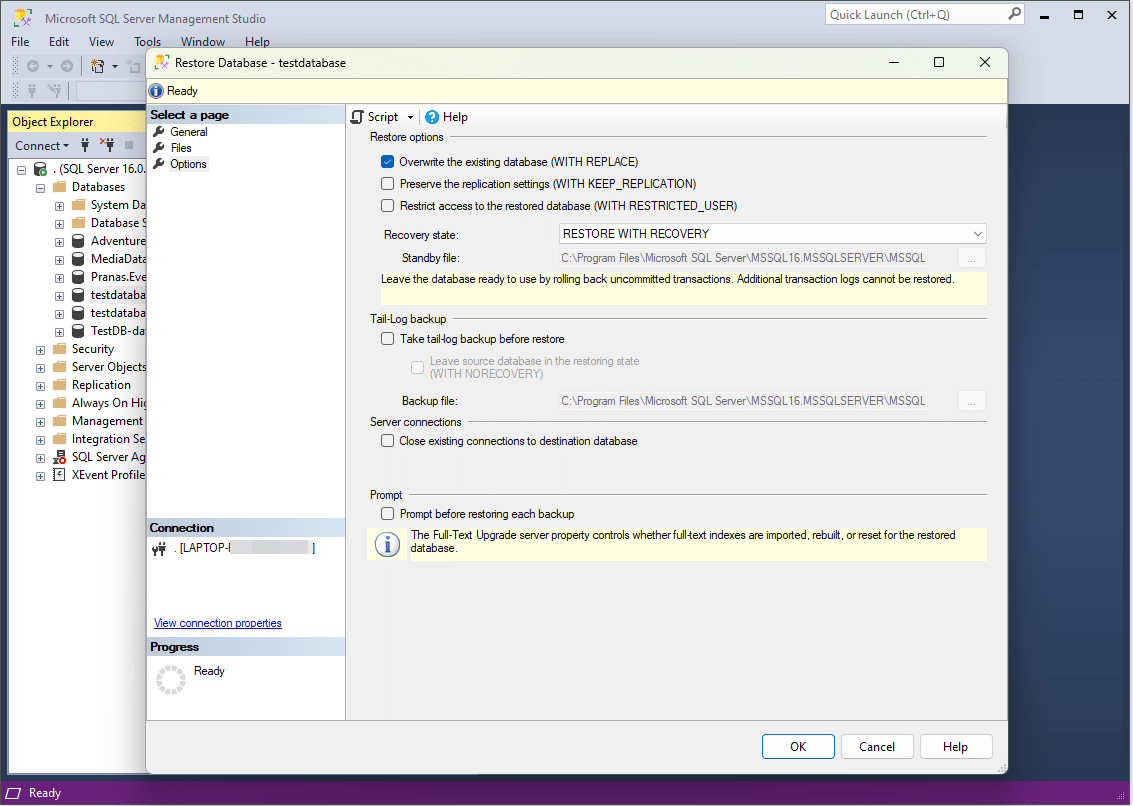
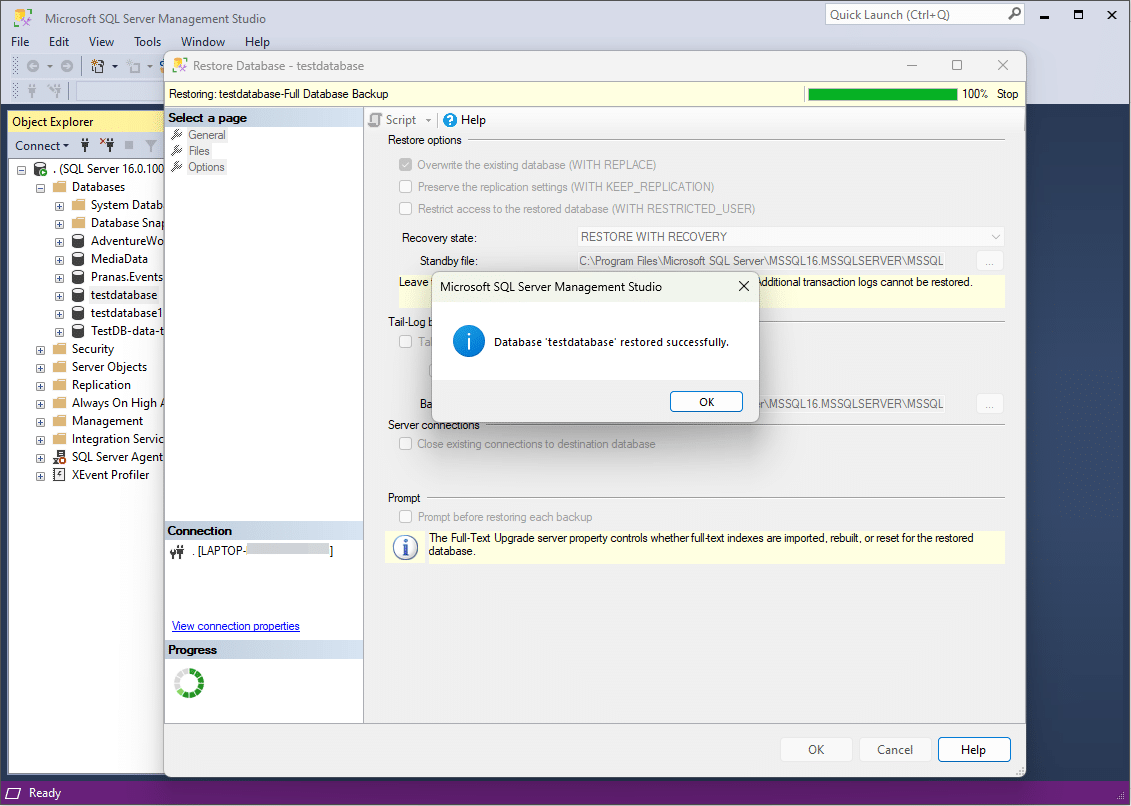
Step 4: Begin the restore process
- Click OK to start the restore process.
- SSMS will show the progress of the restore operation. Once the restore is complete, you will receive a success message.
Step 5: Verify the restore
- After the restore is completed, navigate back to the Object Explorer, right-click on the database, and select Properties.
- Check the Recovery Model and ensure that the database is in the desired state (e.g., Simple, Full).
- You can also run a quick query to verify that the database is restored correctly.
Via SqlBak
If you’re looking for an automated, user-friendly tool that simplifies the backup process, SqlBak is an excellent option. SqlBak is a popular cloud service for automating SQL Server backups to the cloud, and it works with SQL Server 2008. This software supports Transaction Log backups, Differential backups, logical and physical backups, and it supports the following backup storage options: NAS, FTP/SFTP, Dropbox, Google Drive, OneDrive, OneDrive For Business, Amazon S3, Azure Storage, Box, Backblaze B2, Yandex.Disk, and S3 Compatible storage.
Step by step guide how to backup SQL Server 2008 via SqlBak
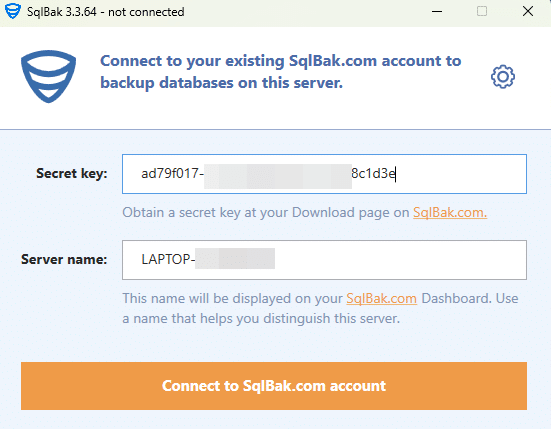
Step 1: Install SqlBak and register the server on SqlBak account
- Download and install SqlBak app from https://sqlbak.com/download.
- Launch the application and register your server on your SqlBak account using the provided secret key (found on the https://sqlbak.com/download page of your account after registration):
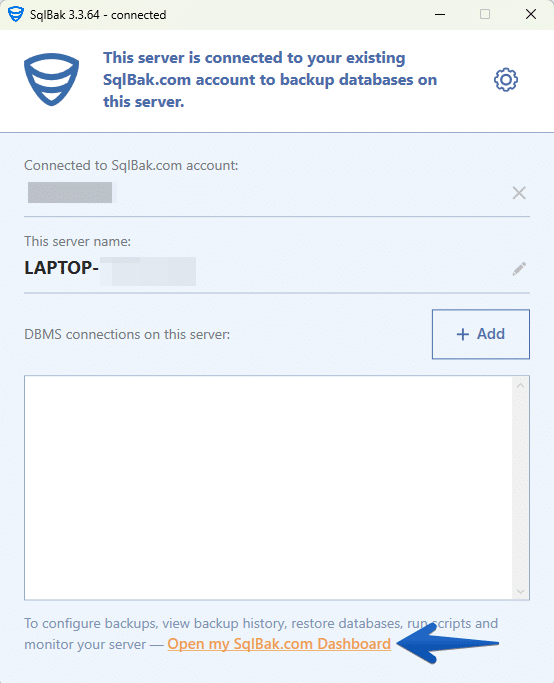
Step 2: Set up a new Backup job
- Click the “Open my SqlBak.com Dashboard” link to open your SqlBak account:
2. On the dashboard, select your connected SQL Server and create a new backup job by clicking Add new job.

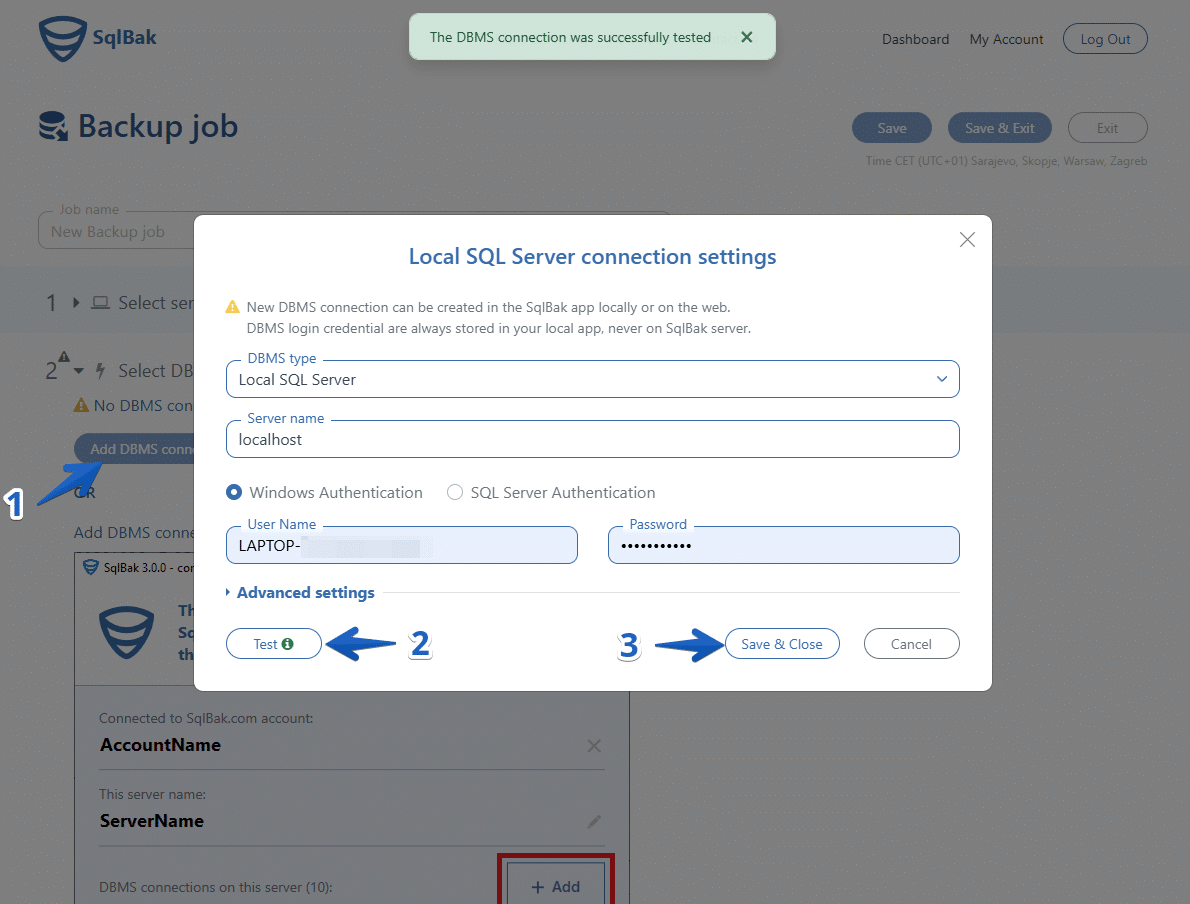
3. Configure your database connection:
-
- Choose the DBMS Connection Type as Local SQL Server.
- Enter the server name and credentials for authentication.
- Click Test to confirm the connection, then click Save & Close.
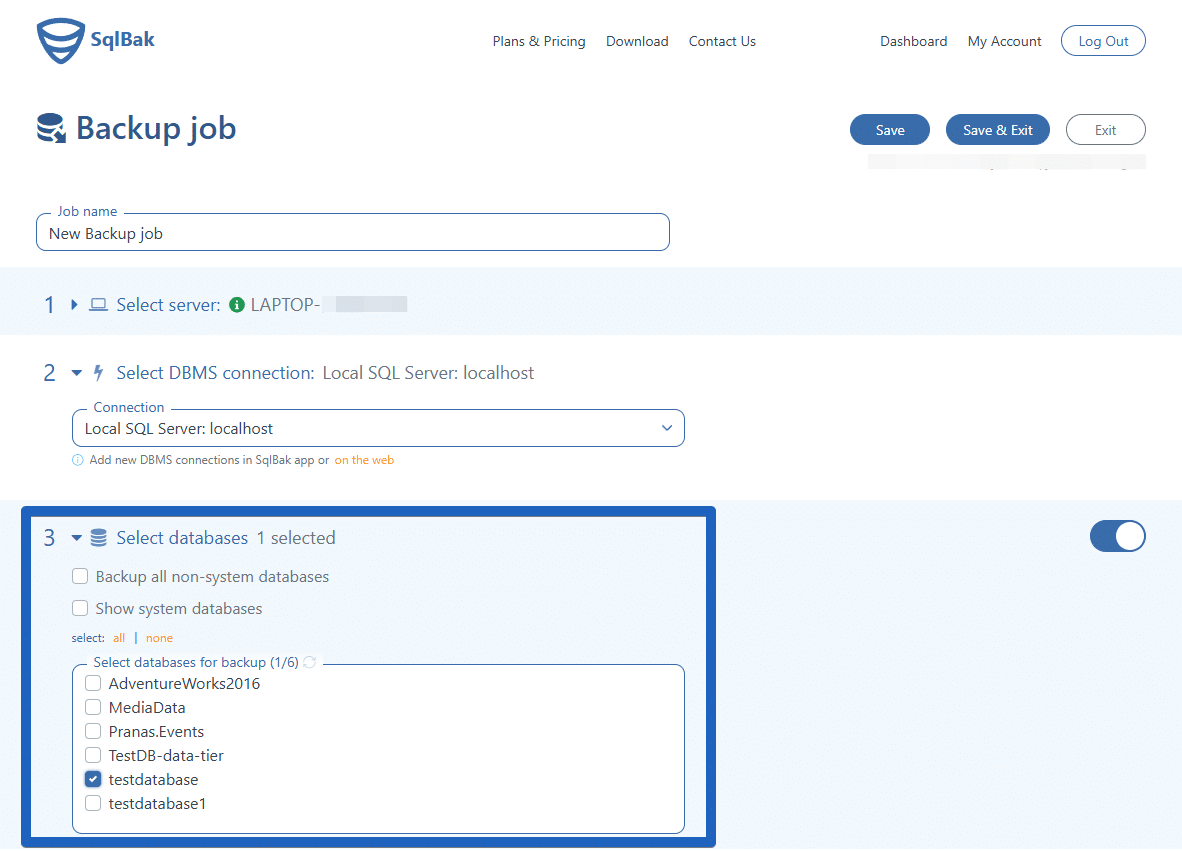
Step 3: Configure the backup job
- Select the databases you want to backup:
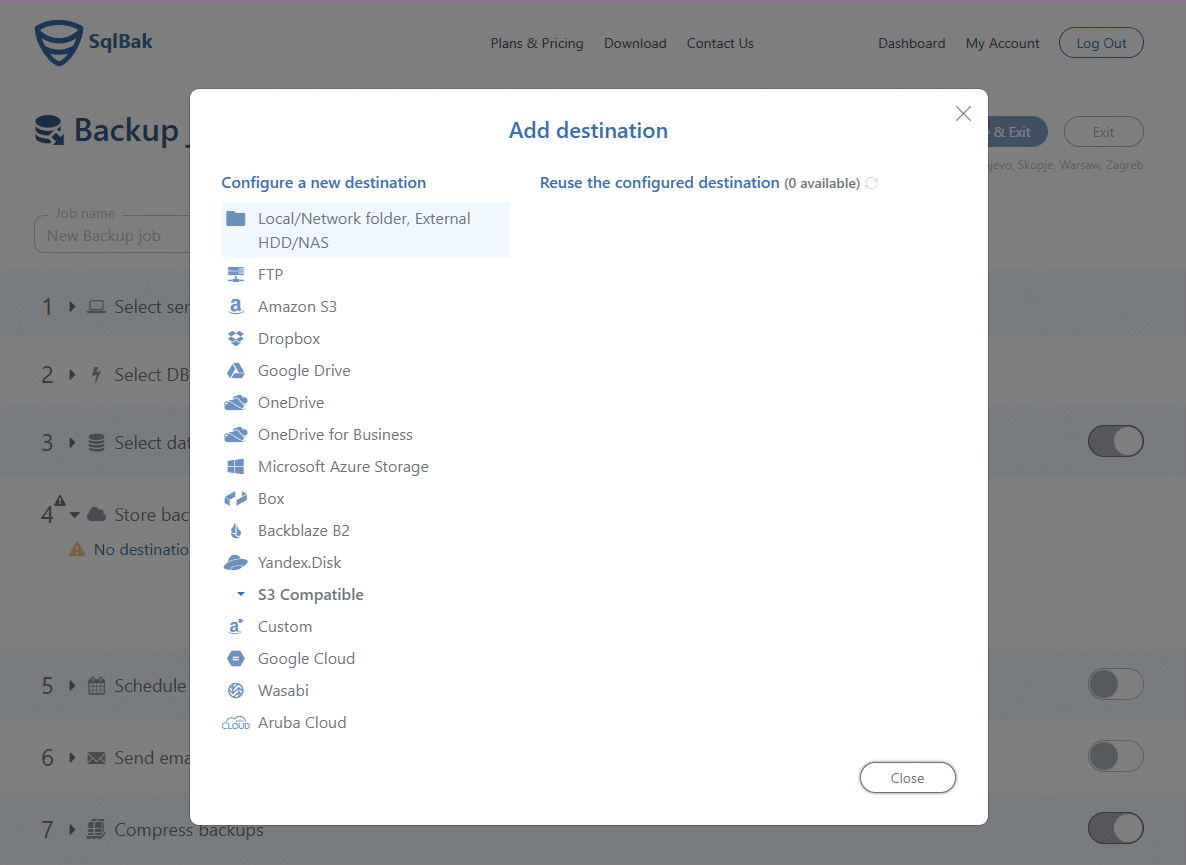
2. Select one or more destinations for the backup, such as local storage, FTP, Google Drive, or Amazon S3:
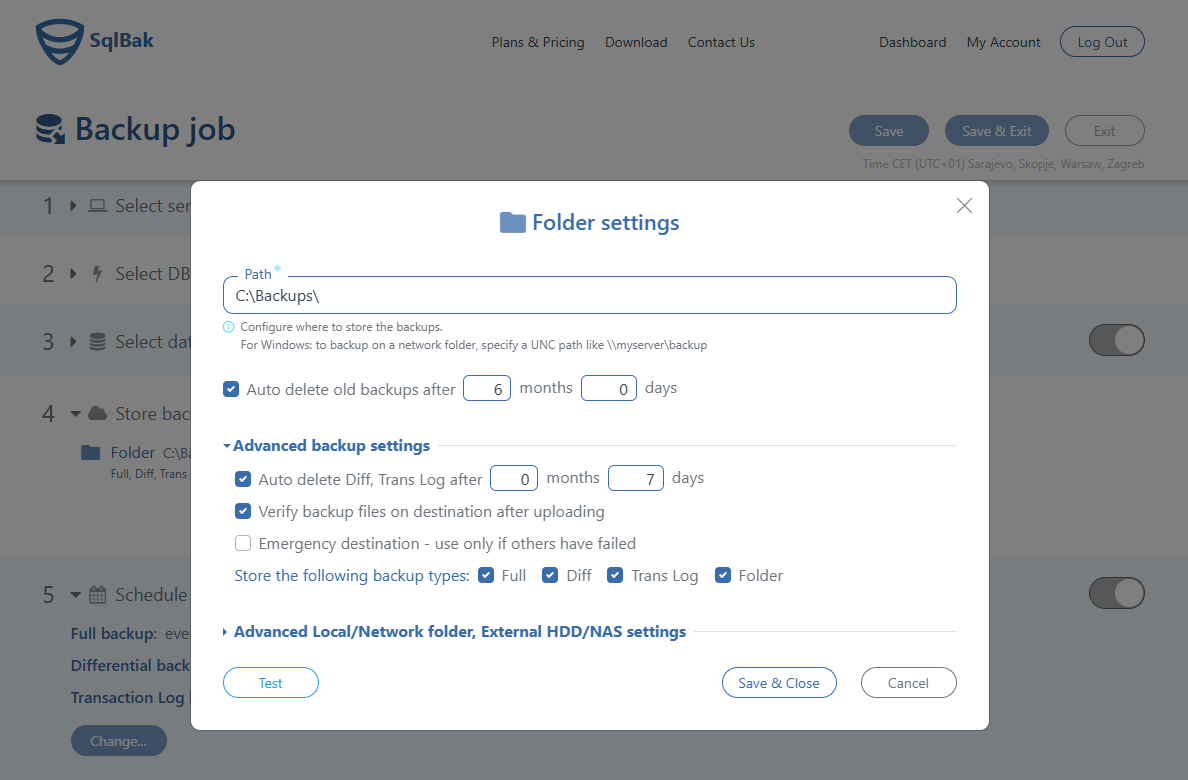
3. Set retention policies – configure automatic deletion of old backups after a specified period:
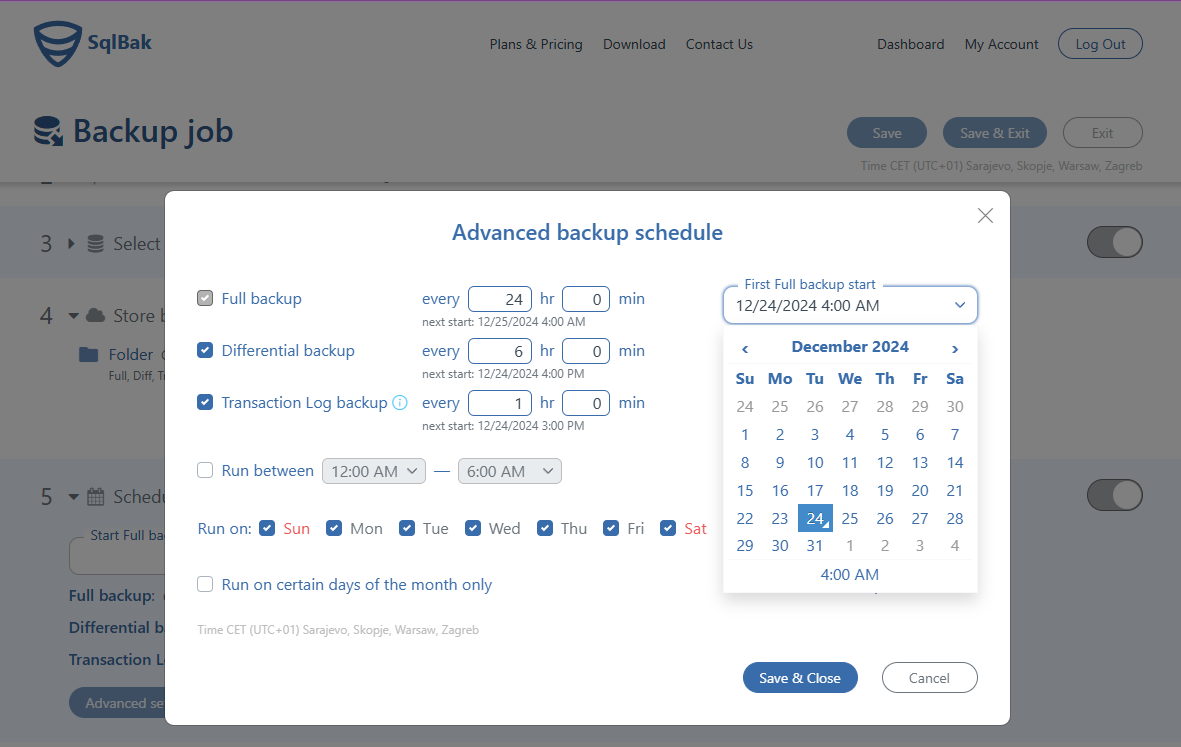
4. Schedule backup. Set up a schedule for automatic Full, Diff and Transaction log backups.
You can choose the time to run your backups and set specific days of the week or month to suit your schedule:
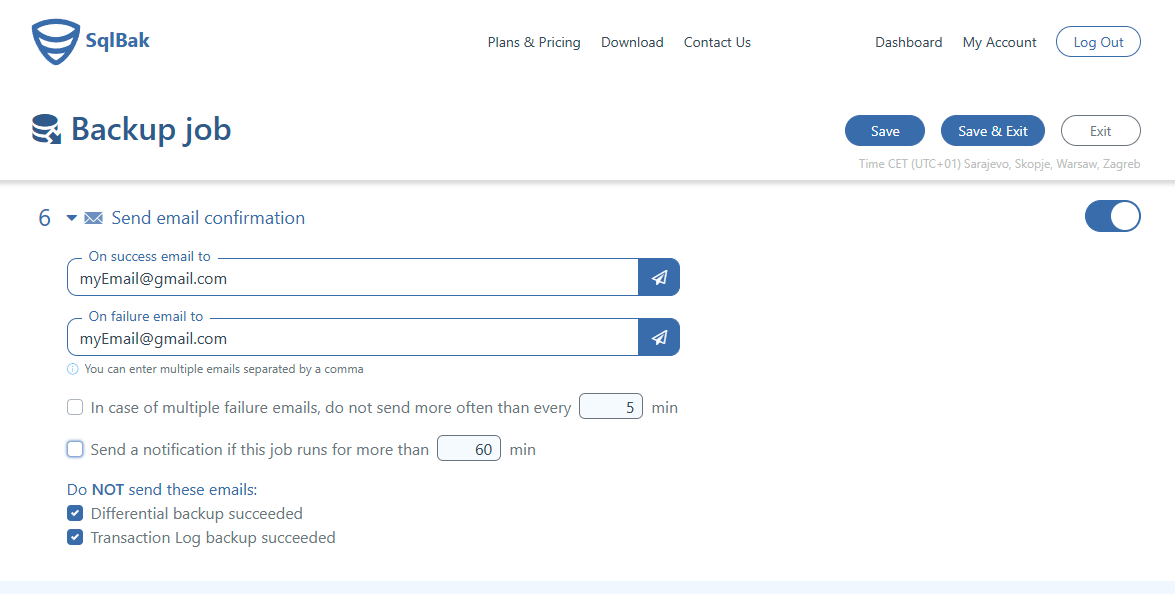
5. Configure email notifications. Enter the email address where you want to receive notifications. You can customize your preferences to:
- Receive emails for job successes, failures, or both.
- Group multiple notifications into a single email to avoid clutter.
- Send alerts if a job runs longer than expected, indicating a possible issue or if the job gets stuck.
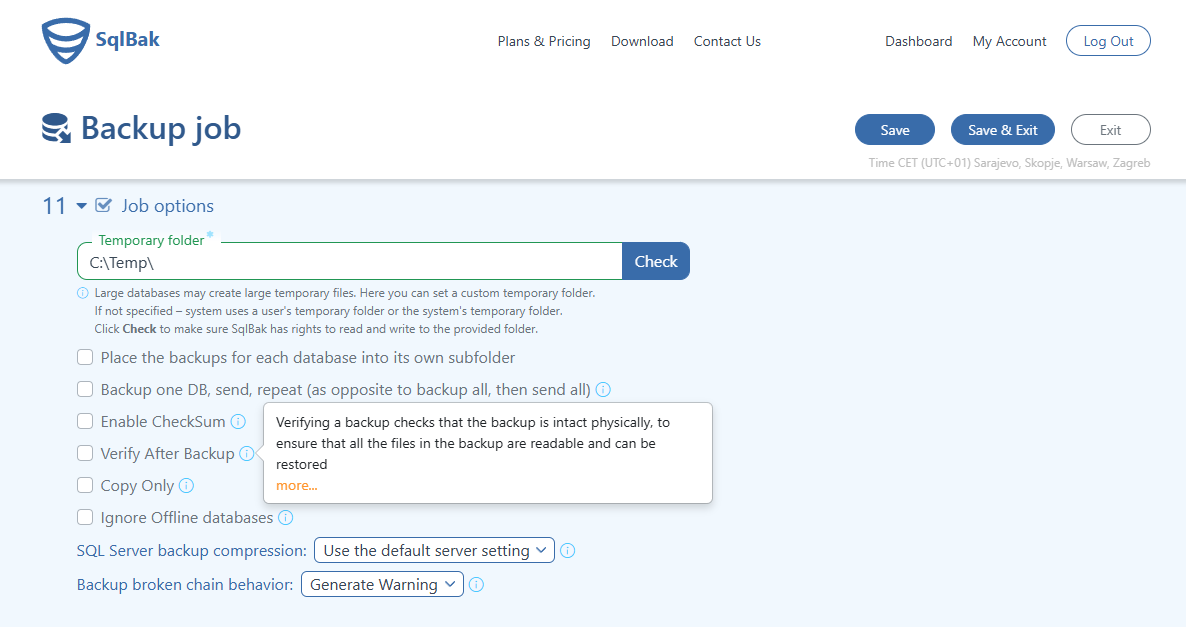
6. Configure additional options:
- Compression. Enable zip or 7-zip compression to reduce file size.
- Encryption. Use AES-256 encryption for secure backups if needed.
- You can choose the time to run your backups and set specific days of the week or month to suit your schedule.
- Set more options like Temporary folder as a temporary files storage, Checksum, Verify After Backup and other…
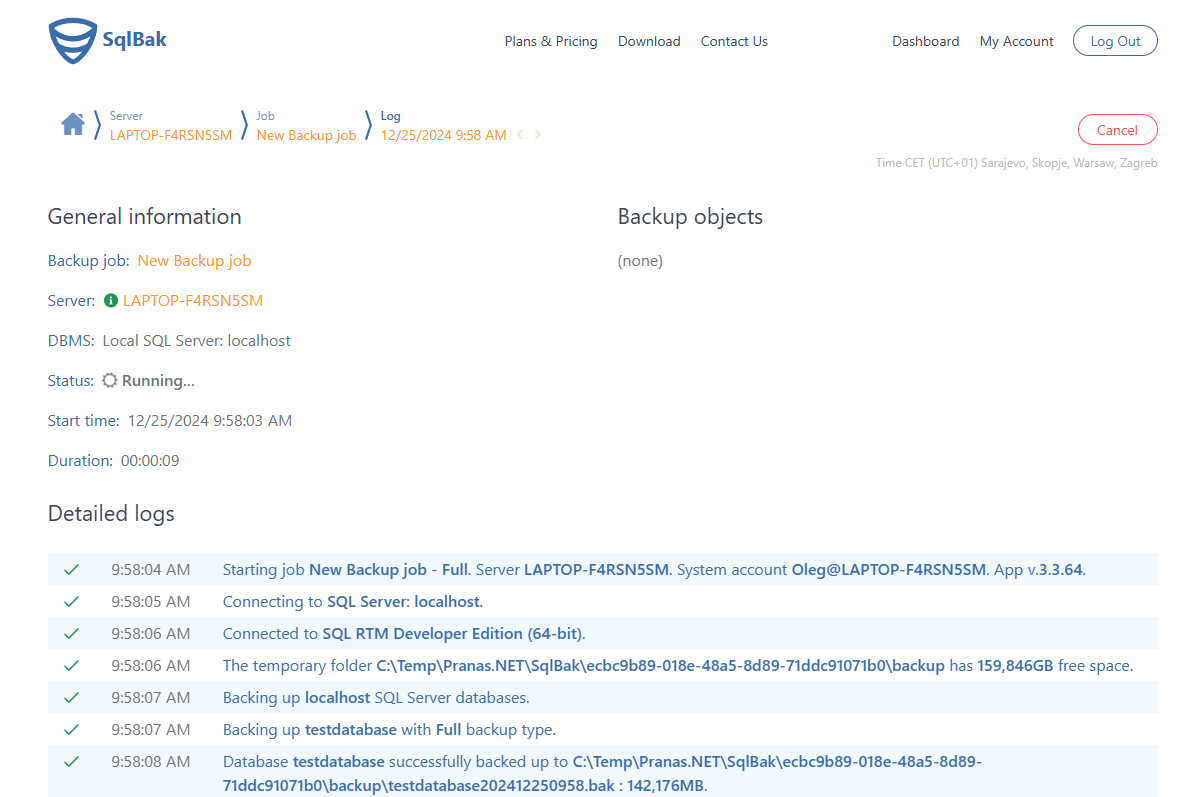
7. Save the configuration and click Run Now to perform an immediate backup:
How to restore SQL Server 2008 via SqlBak
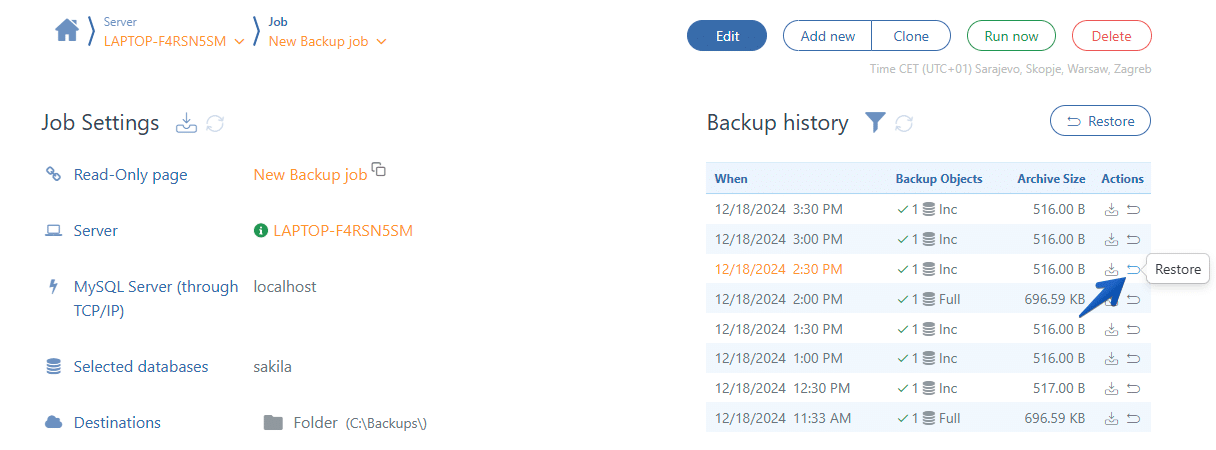
The backups can be easily restored by clicking the “restore” icon on your backup job’s settings page. Just choose a backup you need to restore, click the “restore” icon and follow the instructions. If it is a full or incremental backup, all the needed backups will be restored automatically:
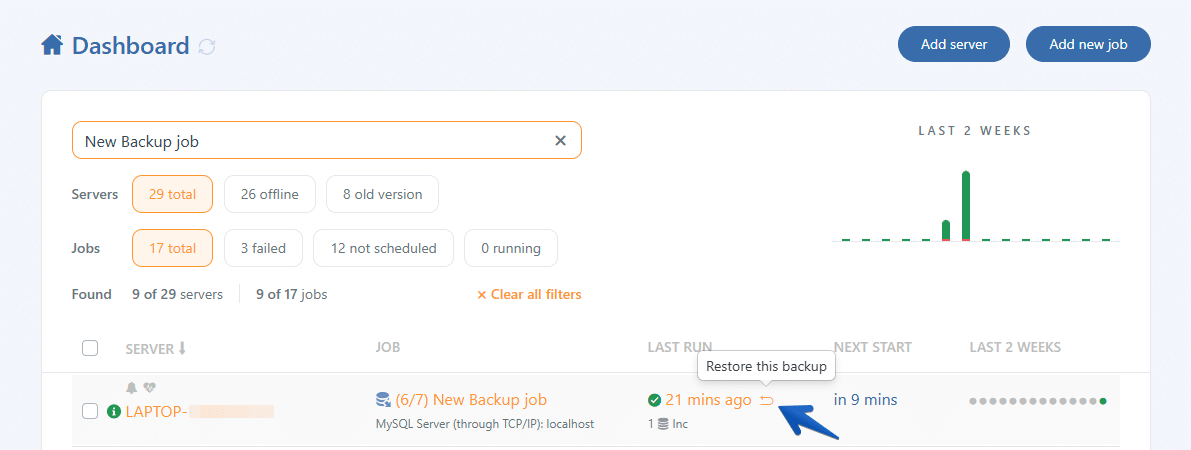
Also, the very last backup can be restored from your “Dashboard” page, just click the “restore” icon at the “LAST RUN” column:
Conclusion
Backup SQL Server 2008 is critical for protecting your data against loss. Whether you prefer using the built-in tools in SQL Server Management Studio or the convenience of SqlBak, following the steps above will ensure your databases are safely backed up and ready to restore when needed.