If you have an important database, then you need to make sure to back it up regularly. Preferably, you will make sure this happens automatically. But performing regular backups is only half the battle — you also have to consider where to store them. Saving the backups on the same server where the MySQL Server is installed isn’t safe, because if it crashes, you will lose everything.
Fifteen years ago backups were often simply transferred via FTP to be stored on magnetic tape. However, now that security requirements are different, it is good practice to store the backup in encrypted form using a service such as Amazon Simple Storage Service (AWS S3).
How to Perform Backups via AWS Command Line Interface
Let’s take a look at how to perform backups of a MySQL Server and send the backups to S3.
- First of all, you have to install AWS Command Line interface:
curl "https://awscli.amazonaws.com/awscli-exe-linux-x86_64.zip" -o "awscliv2.zip"
unzip awscliv2.zip
sudo ./aws/install
you can find more information here.
-
Then configure AWS CLI. To do this, execute:
aws configure
This command will ask you for an access key and a secret key, it looks like this:

How to create access keys for access only to S3 can be found here. The list of supported regions is here. It is not necessary to specify the region, but we highly recommend you to do so, otherwise, you will not be able to understand where the backups were uploaded. -
Now it’s time to perform a backup. The easiest way to do it is via mysqldump:
sudo mysqldump sakila | gzip > sakila.gz
-
To upload the backup into a bucket, use the utility you previously installed.
aws s3 cp sakila.gz s3://<bucket-name>/mysql-backup/
-
Finally, it will be useful to create a cron job to regularly perform backups and upload them to S3.
sudo crontab -e
There you can add a string that performs a backup every 24 hours at midnight, giving the backup a unique name. Thus, every night, you’ll get a new backup on S3.
0 */24 * * * sudo mysqldump sakila | gzip > `date +"%Y-%m-%d"-sakila.gz` && aws s3 cp `date +"%Y-%m-%d"-sakila.gz` s3://<bucket-name>/mysql-backup/
After adding the above cron job, everything should be set unless something unexpected happens. For example, a manager may forget to pay the bill for AWS S3 or you run out of disk space and old backups need to be deleted.
But what if you have several databases, and for each of them, you have to apply different backup strategies? Or what if you need logs to check what is happening so that you can quickly resolve any issues? Then the cron job will not be enough.
Third-party services can help with this.
How to Perform Backups via SqlBak
One of these services is SqlBak. To set a job to backup MySQL Server databases with SqlBak automatically and send the backups to S3, please follow these steps:
- First of all, create a SqlBak account.
- Then install the SqlBak app on the server. To install this you have to execute the command that is specified on the download page. If the installation is successful, the terminal will display the following text:

- Now set the connection to your MySQL Server.

- This completes the SqlBak app installation. Now you need to create a backup job on your dashboard page. Just click on the “Add new job” button.

- On the opened backup job settings page choose the databases that should be backed up in the “Select databases” section.

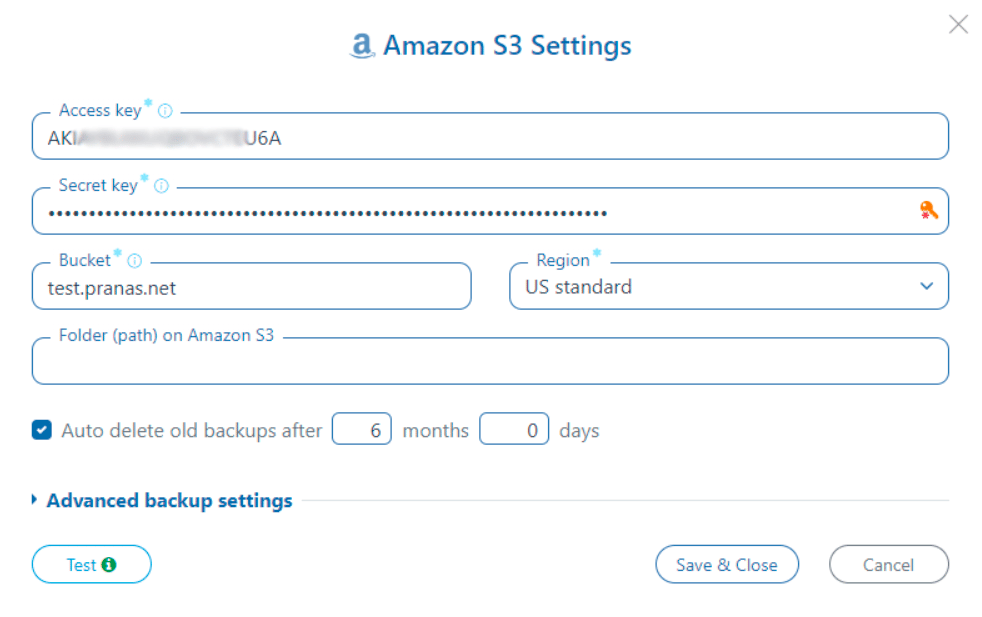
- Then in the “Store backups in destinations” section choose Amazon S3 as a destination place and specify access and secret keys.

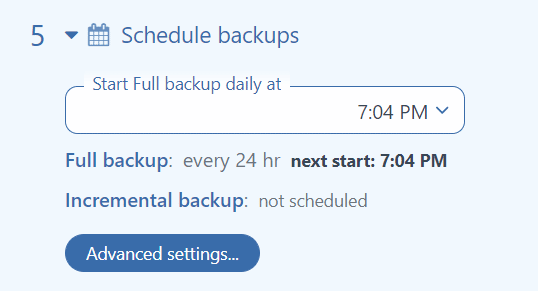
- Set the schedule you need.

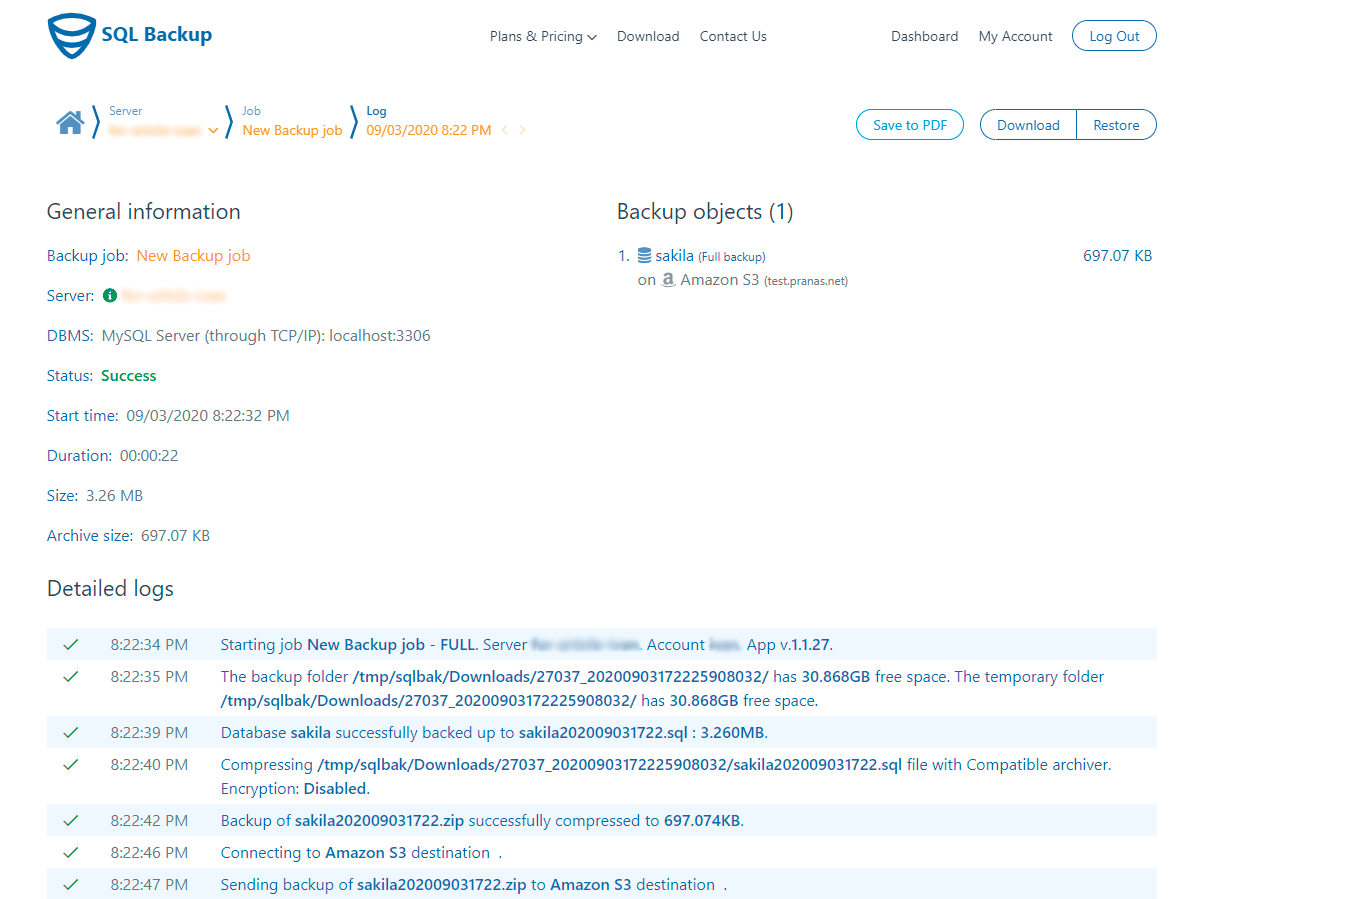
- The last step is to click the “Run Now” button. The backup job will be run and the log of the upload to S3 will be displayed.

In addition, SqlBak can send you email notifications if there are problems with a backup job, encrypt the backups, set up an automatic restore to another server, and delete outdated backups.
Finally, no matter how you defend your databases, always test your restore scenarios. If something goes wrong, you must be sure that you can restore the backups quickly and reliably.

