 Creating backups of a SQL Server database is one of the most critical aspects of maintaining a system. There are various tools available for creating backups, such as SQL Server Management Studio, SqlBak, and SQLBackupAndFTP. However, performing backups via the command line interface can provide even more flexibility and customization options.
PowerShell and batch scripts can be used to perform SQL Server backups via the command line interface. PowerShell scripts offer advanced functionality, while batch scripts are simpler and easier to use. Command line backups provide more flexibility and customization options than GUI-based tools.
This article provides an overview of the process involved in performing SQL Server backups via the command line interface and discusses the advantages of using PowerShell and batch scripts.
SQL to backup a database
To perform a SQL Server backup via T-SQL, you can use the BACKUP DATABASE statement. This statement creates a full database backup of the specified database, which can be used to restore the database to its state at the time the backup was taken.
The basic syntax for backing up a database using T-SQL is as follows:
BACKUP DATABASE [database_name]
TO DISK = 'C:\Backup\backup_file.bak'
WITH INIT
-
[database_name]– The name of the database to be backed up. -
TO DISK = 'C:\Backup\backup_file.bak'– The path and filename of the backup file to be created. This can be any valid file path and filename. -
WITH INIT– This option overwrites any existing backup file with the same name as the one being created.
You can modify the options in the WITH clause to suit your specific backup needs. For example, you can enable compression to reduce the size of the backup file and display backup progress information using the COMPRESSION and STATS options, respectively.
Note that in order to perform a backup using T-SQL, the user must have sufficient permissions to execute the BACKUP DATABASE statement and access the specified backup file path.
SQL to restore a database
To restore a SQL Server database from a backup file, you can use the RESTORE DATABASE statement in T-SQL. The basic syntax for restoring a database from a backup file is as follows:
RESTORE DATABASE [database_name]
FROM DISK = 'C:\Backup\backup_file.bak'
WITH RECOVERY
-
[database_name]– The name of the database to be restored. -
FROM DISK = 'C:\Backup\backup_file.bak'– The path and filename of the backup file to be restored. -
WITH RECOVERY– This option specifies that the database should be left in a recovered state, making it available for use.
Note that in order to restore a database using T-SQL, the user must have sufficient permissions to execute the RESTORE DATABASE statement and access the specified backup file path.
Restore DB with a Different Name
Restoring a database with a different name can be useful when you need to create a copy of an existing database or restore a database to a different SQL Server instance. In this section, we will explore how to restore a SQL Server database with a different name using T-SQL.
The basic syntax for restoring a database with a different name is as follows:
RESTORE DATABASE [new_database_name]
FROM DISK = 'C:\Backup\backup_file.bak'
WITH MOVE '[original_logical_data_file_name]' TO '[new_physical_data_file_path]',
     MOVE '[original_logical_log_file_name]' TO '[new_physical_log_file_path]'
-
[new_database_name]– The new name of the database to be restored. -
FROM DISK = 'C:\Backup\backup_file.bak'– The path and filename of the backup file to be restored. -
WITH MOVE– This option maps the logical file names in the backup file to the new physical file names and paths for the database files.
When restoring a database with a different name, you need to use the WITH MOVE option to specify the new physical file names and paths for the database files. This option maps the logical file names in the backup file to the new physical file names and paths. The MOVE option requires two parameters: the original logical file name and the new physical file path.
To determine the logical file names of the data and log files in the backup file, you can use the following T-SQL statement:
RESTORE FILELISTONLY FROM DISK = 'C:\Backup\backup_file.bak'
This statement retrieves a list of the files contained in the backup file, including the logical file names, sizes, and other attributes.
For example, to restore a database named “AdventureWorks” as “AdventureWorksCopy” with the data file moved to “C:\Data\AdventureWorksCopy.mdf” and the log file moved to “C:\Log\AdventureWorksCopy.ldf”, you would use the following T-SQL statement:
RESTORE DATABASE AdventureWorksCopy
FROM DISK = 'C:\Backup\AdventureWorks.bak'
WITH MOVE 'AdventureWorks_Data' TO 'C:\Data\AdventureWorksCopy.mdf',
     MOVE 'AdventureWorks_Log' TO 'C:\Log\AdventureWorksCopy.ldf'
SQL Server Backup Command Line
 This section covers how to perform SQL Server backups using the command line interface. It includes examples of backup scripts and utilities that can help automate the backup process.
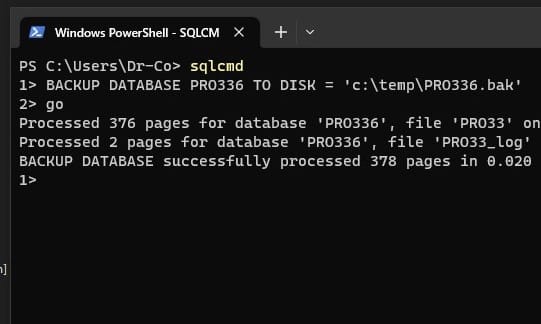
sqlcmd backup database to Local Disk
sqlcmd is a command-line utility provided by Microsoft for interacting with SQL Server. It allows you to execute SQL statements, stored procedures, and script files, as well as perform various administrative tasks.
To perform a SQL Server backup using sqlcmd, you can use the -Q option to specify a backup command to be executed. The basic syntax for backing up a database using sqlcmd is as follows:
sqlcmd -S [server_name] -Q "BACKUP DATABASE [database_name] TO DISK='C:\Backup\backup_file.bak' WITH INIT"
-
-S [server_name]– The name of the SQL Server instance to connect to. -
-Q– Specifies a query to be executed. -
"BACKUP DATABASE [database_name] TO DISK='C:\Backup\backup_file.bak' WITH INIT"– The backup command to be executed.
sqlcmd restore a database from Local Disk
To restore a SQL Server database using sqlcmd, you can use the -Q option to specify a restore command to be executed. The basic syntax for restoring a database using sqlcmd is as follows:
sqlcmd -S [server_name] -Q "RESTORE DATABASE [database_name] FROM DISK='C:\Backup\backup_file.bak' WITH RECOVERY
-
-S [server_name]– The name of the SQL Server instance to connect to. -
-Q– Specifies a query to be executed. -
RESTORE DATABASE [database_name] FROM DISK='C:\Backup\backup_file.bak' WITH RECOVERY– The restore command to be executed.
PowerShell SQL Backup All Databases
 PowerShell is a command-line shell and scripting language developed by Microsoft. It includes several modules for interacting with SQL Server, making it a powerful tool for automating SQL Server tasks, including backups. One such module is the SQLServer module, which provides cmdlets for backup and restore operations.
To use the SQLServer module for backups, you first need to install it. You can install the module using the following command:
Install-Module -Name SqlServer
Once the module is installed, you can use the Backup-SqlDatabase cmdlet to perform backups. The cmdlet allows you to specify the database to back up, the backup file path, and various backup options.
To backup all databases on a SQL Server instance, you can use the following command:
Get-ChildItem "SQLSERVER:\SQL\[server-name]\[instance-name]\Databases" | Backup-SqlDatabase -BackupContainer "[backup-path]"
Replace [server-name], [instance-name], and [backup-path] with the appropriate values for your environment. The Get-ChildItem cmdlet retrieves all the databases on the specified SQL Server instance and passes them to the Backup-SqlDatabase cmdlet for backup.
Here’s an example of backing up all databases on a SQL Server instance:
Get-ChildItem "SQLSERVER:\SQL\MSI\DEFAULT\Databases" | Backup-SqlDatabase -BackupContainer "c:\Backups2\"
This command backs up all databases on the “MSI” SQL Server instance to the “c:\Backups2” folder.
PowerShell SQL Server Differential Backup
Differential backups can significantly reduce the time and resources needed for backups, as they only include the changes made to the database since the last full backup. This can make the backup process more efficient and reduce the risk of data loss.
To perform a differential backup using PowerShell, use the Backup-SqlDatabase cmdlet with the -Incremental parameter. Here’s an example:
Backup-SqlDatabase -ServerInstance "." -Database "AdventureWorks" -BackupFile "C:\Backups\AdventureWorks_diff.bak" -Incremental
This command creates a differential backup of the “AdventureWorks” database and saves it to the “C:\Backups\AdventureWorks_diff.bak” file.
PowerShell SQL Restore Database
In addition to performing backups, PowerShell can also be used to restore SQL Server databases. The SQLServer module provides the Restore-SqlDatabase cmdlet for restoring databases from backup files.
The basic syntax for restoring a database using PowerShell is as follows:
Restore-SqlDatabase -ServerInstance [server-instance] -Database [database-name] -BackupFile [backup-file] -ReplaceDatabase
-
-ServerInstance [server-instance]– The name of the SQL Server instance to connect to. -
-Database [database-name]– The name of the database to be restored. -
-BackupFile [backup-file]– The path and filename of the backup file to be restored. -
-ReplaceDatabase– This option specifies that the existing database should be replaced by the restored database.
Here’s an example of restoring a database using PowerShell:
Restore-SqlDatabase -ServerInstance '.' -Database 'MyDatabase' -BackupFile 'C:\Backup\MyDatabase.bak' -ReplaceDatabase
This command restores the “MyDatabase” database from the backup file located at “C:\Backup\MyDatabase.bak” to the local SQL Server instance and replaces the existing database if it exists.
PowerShell SQL Server Restore Differential Backup
To restore a SQL Server database from a differential backup using PowerShell, you first need to restore the full backup with the -NoRecovery option, then restore the differential backup.
To restore the full backup, use the Restore-SqlDatabase cmdlet with the -NoRecovery and -ReplaceDatabase options. Here’s an example:
Restore-SqlDatabase -ServerInstance '.' -Database 'AdventureWorks' -BackupFile 'C:\Backups\AdventureWorks_full.bak' -NoRecovery -ReplaceDatabase
This command restores the full backup of the “AdventureWorks” database from the “C:\Backups\AdventureWorks_full.bak” backup file to the local SQL Server instance and replaces the existing database if it exists.
Once the full backup is restored, you can restore the differential backup using the same Restore-SqlDatabase cmdlet, without the -NoRecovery option. Here’s an example:
Restore-SqlDatabase -ServerInstance '.' -Database 'AdventureWorks' -BackupFile 'C:\Backups\AdventureWorks_diff.bak'
This command restores the differential backup of the “AdventureWorks” database from the “C:\Backups\AdventureWorks_diff.bak” backup file to the local SQL Server instance.
Backup Scripts
While one-line commands can be useful, backup scripts provide more options and can automate the backup process. Backup scripts can be written in different languages, such as batch, PowerShell, and Bash, depending on your needs and environment.
Batch script to backup SQL Server database
 A batch script can be a convenient way to automate SQL Server backups. The following example batch script creates a full database backup of the specified SQL Server database to a local disk, and deletes any backup files older than the specified number of days. If the backup fails, an error message is written to the Windows event log.
@echo off

set DB_NAME=MyDatabaseName
set BACKUP_DIR=C:\Backups
set DAYS_TO_KEEP=0

echo Starting backup of %DB_NAME% database...

sqlcmd -E -S . -Q "BACKUP DATABASE %DB_NAME% TO DISK='%BACKUP_DIR%\%DB_NAME%_%date:/=-%_%time::=-%.bak' WITH INIT, COMPRESSION"

if %ERRORLEVEL% neq 0 (
    echo Backup failed with error code %ERRORLEVEL%.
    eventcreate /T ERROR /L APPLICATION /ID 100 /D "SQL Server backup failed with error code %ERRORLEVEL%."
    goto end
)

echo Deleting old backup files older than %DAYS_TO_KEEP% days in directory %BACKUP_DIR% ...

forfiles /P "%BACKUP_DIR%" /M "%DB_NAME%*.bak" /D -%DAYS_TO_KEEP% /C 2>nul "cmd /c if @ISDIR==FALSE del @PATH"

echo Old backup files deleted successfully.

:end
echo Script complete.
To use this script, replace the value of the DB_NAME variable with the name of the SQL Server database you want to backup, and replace the value of the BACKUP_DIR variable with the appropriate path for storing the backup files. You can also adjust the value of the DAYS_TO_KEEP variable to change the number of days to keep backup files.
PowerShell Script to Backup All SQL Databases
This section contains a PowerShell script that can be used to backup all SQL databases. The script performs the following tasks:
- Gets a list of all SQL Server databases
- Mounts the network drive
- Creates a backup of each database
- Compresses the backup file
- Copies the backup file to the network drive
- Deletes expired backups
- Unmounts the network drive
- Sends an error notification if there was an error
invoke-sqlcmd

# Set variables
$backupFolderPath = "C:\temp"  # Backup folder path
$compressionLevel = "2"  # Archive compression level (1-9)
$expirationDays = 7  # Number of days after which backups will be deleted

# Set credentials for network drive
$networkDrive = "Z" # Temporary network drive
$networkPath = "\\server\backup\folder"
$networkUser = "network-user"
$networkPassword = "network-password"

$eventLogName = "Application"
$eventSource = "MSSQLSERVER"

Write-Host "Starting SQL Server database backup script"

# Get list of all SQL Server databases
$databases = Get-ChildItem "SQLSERVER:\SQL\MSI\DEFAULT\Databases" | Where-Object {$_.Name -ne "tempdb"}

Write-Host "Found $($databases.Count) databases"

# Create backup folder if it does not exist
if (!(Test-Path -Path $backupFolderPath)) {
    New-Item -ItemType Directory -Path $backupFolderPath | Out-Null
    Write-Host "Created backup folder: $backupFolderPath"
}

New-PSDrive -Name $networkDrive -PSProvider FileSystem -Root $networkPath -Credential (New-Object System.Management.Automation.PSCredential($networkUser,(ConvertTo-SecureString $networkPassword -AsPlainText -Force)))
# Mount network drive

# Backup databases
foreach ($database in $databases) {
    Write-Host "Creating backup for database $($database.Name)"
    $backupFile = Join-Path $backupFolderPath "$($database.Name)_$(Get-Date -Format 'yyyyMMdd_HHmmss').bak"
    Backup-SqlDatabase -ServerInstance "." -Database $database.Name -BackupFile $backupFile  -Initialize

    if ($?) {
        Write-Host "Backup for database $($database.Name) was created."
    } else {
        $errorDetails = "Error creating backup for database $($database.Name). Details: " + $Error[0].Exception.Message
        Write-EventLog -LogName $eventLogName -Source $eventSource -EntryType Error -EventId 1 -Message $errorDetails
        continue
    }

    Write-Host "Created backup for database $($database.Name)"

    # Compress backup
    $zipFile = "$backupFile.zip"
    Compress-Archive -Path $backupFile -CompressionLevel Optimal -DestinationPath $zipFile

    if ($?) {
        Write-Host "Backup for database $($database.Name) was zipped."
    } else {
        $errorDetails = "Error creating backup for database $($database.Name). Details: " + $Error[0].Exception.Message
        Write-EventLog -LogName $eventLogName -Source $eventSource -EntryType Error -EventId 1 -Message $errorDetails
        continue
    }

    Write-Host "Compressed backup $($backupFile)"

    # # Copy file to network drive
    cp $zipFile "$($networkDrive):\$(Split-Path $zipFile -leaf)"

    if ($?) {
        Write-Host "Backup for database $($database.Name) was created and sent to storage successfully."
    } else {
        $errorDetails = "Error creating backup for database $($database.Name). Details: " + $Error[0].Exception.Message
        Write-EventLog -LogName $eventLogName -Source $eventSource -EntryType Error -EventId 1 -Message $errorDetails
        continue
    }

    # Delete expired backups
    Get-ChildItem $backupFolderPath -Recurse | Where-Object {($_.LastWriteTime -lt (Get-Date).AddDays(-$expirationDays)) -and ($_.Extension -eq ".zip")} | Remove-Item

    # Delete expired backups from backup storage
    Get-ChildItem "$($networkDrive):\" -Recurse | Where-Object {($_.LastWriteTime -lt (Get-Date).AddDays(-$expirationDays)) -and ($_.Extension -eq ".zip")} | Remove-Item

    Write-Host "Deleted expired backups"

    # Send error notification if there was an error
}

Write-Host "SQL Server database backup script finished"

# # Unmount network drive
Remove-PSDrive -Name $networkDrive
SQL Server command line backup tool
Instead of creating a complex PowerShell or Bash script on your own, you can use the sqlbak-cli utility.
SqlBak-CLI is a simple command-line tool for creating database backups and sending them to storage. This utility can also restore the backups it creates. It can send backups to network folders, FTP, SFTP, and Backblaze. Documentation and download instructions can be found at this link.
To get started, simply create a JSON file that describes how to connect to the database and how to connect to the backup storage.
Backup all databases to another server over SSH using SqlBak-CLI
Create a file called backup-job-settings.json with the connection details for the database and network folder.
{
    "source":
        {
            "type":"mssql",
            "source_name":"source-name",
            "data_source":".",
            "trust_server_certificate":true,
            "is_integrated_security":false,
            "user_name":"sa",
            "user_password":"*******",
            "databases": [ "mssql_custom" ]
        },
       "storages":[
          {
             "type":"sftp",
             "server_name":"backup-storage.com",
             "user_name":"ftp-user",
             "user_password":"*************",
             "path":"backups"
          }
       ]
}
To run the backup, execute the following command:
sqlbak-cli run-backup --job-settings=backup-settings.json
Restore a database to another server over SSH using SqlBak-CLI
To restore a backup, create a file called restore-job-settings.json.
{
    "type": "restore",
    "target": {
    "type":"mssql",
    "data_source":".",
    "trust_server_certificate":true,
    "user_name":"sa",
    "user_password":"********",
    "databases": [
            {
                "source_name": "wordpress",
                "target_name": "wordpress"
            }
        ],
    },
    "storage": {
        "destination_type":"sftp",
        "server_name":"backup-storage.com",
        "user_name":"ftp-user",
        "user_password":"*************",
        "path":"backups"
    }
}
To run the restore, use the following command:
sqlbak-cli run-restore --job-settings=restore-settings.json
Automating Backups with SqlBak-CLI, PowerShell, and Batch Scripts
Once you have your backup scripts set up using SqlBak-CLI, PowerShell, or Batch, you can automate their execution using the Task Scheduler in Windows. This is particularly useful if you want to run backups on a regular schedule without having to remember to do it manually.
To set up an automated backup, follow these steps:
- Open the Task Scheduler by typing “Task Scheduler” in the Start menu and clicking on the appropriate result.
- Click “Create Basic Task” in the Actions pane on the right-hand side of the Task Scheduler window.
- Name the task, and then click “Next.”
- Choose the frequency of the backup, and then click “Next.” For example, if you want to back up your database every day at midnight, choose “Daily” and set the time to 12:00 AM.
- Choose “Start a program” as the action for the task, and then click “Next.”
- Enter the path to your backup script in the “Program/script” box. For SqlBak-CLI, it might be “sqlbak-cli.exe”. For PowerShell, it might be “powershell.exe”. For Batch, it might be “cmd.exe”.
- For SqlBak-CLI:
In the “Program/script” field, enter the path to the sqlbak-cli.exe file. For example:C:\Program Files\SQLBak-CLI\sqlbak-cli.exe.
In the “Add arguments (optional)” field, enterrun-backupcommand and the path to your backup job JSON file:run-backup --job-settings=C:\backup\my-backup-job.json. - For PowerShell:
In the “Program/script” field, enter the path to the powershell.exe file. For example:powershell.exe.
In the “Add arguments (optional)” field, enter the path to your PowerShell script file, for example:-File C:\Users\UserName\Documents\backup.ps1. - For Batch:
In the “Program/script” field, enter the path to the cmd.exe file. For example:cmd.exe.
In the “Add arguments (optional)” field, enter the path to your batch file, for example:C:\Users\UserName\Documents\backup.bat. - Click “Next,” review the details of the task, and then click “Finish.”
Your backup script will now run automatically according to the schedule you set up.
Conclusion
Database backup is not the only task that a DB administrator must perform. Running backups from the command line can be integrated with automated maintenance scripts for other parts of the infrastructure.
Usually, a single command is not enough, and a script needs to be created. Batch scripts are simpler, but PowerShell provides more possibilities. However, a complex solution will require deep knowledge of PowerShell.
Instead of writing a backup script from scratch, you can use the SqlBak-CLI utility. Simply substitute the correct values in the JSON file fields, and it will send the backup over SSH or upload it to FTP. It can also restore on demand.
If you don’t want to bother with command-line interfaces and scripts, you can check out the following solutions:
- SQLBackupAndFTP – an application for backing up SQL Server and sending the backup to cloud storage.
- SqlBak – a cloud service for centralized backup management on multiple servers.
Your tips were a lifesaver! They saved me a lot of time and frustration! Thank you so much for sharing.
Many Thanks for this great knowledge provided, can you please add the handle to backup a large database into multiple files and also restoring database from multiple files ?
Hello Bertrand,
For backing up a database into two files, please use:
sqlBACKUP DATABASE [db_name] TO DISK = 'D:\Backup\file1.bak', DISK = 'E:\Backup\file2.bak' WITH INIT, FORMAT
For restoring from these two files, please use:
sqlRESTORE DATABASE [db_name] FROM DISK = 'D:\Backup\file1.bak', DISK = 'E:\Backup\file2.bak' WITH RECOVERY, REPLACE
Please note that SQL Server must have read and write permissions to the specified directories.
I have a zip backup compressed and splited into 2 files, my problem is that I am not sure if I am decompressing correctly because after decompressing it the restore shows me errors.
Is there a official way to uncompress it before start the restore process.
Hi Guillermo Viquez,
To restore the backups, simply click on the restore icon, and the split backup files will be restored automatically. For more details about the restore process, please visit https://sqlbak.com/blog/restore-sql-server-backup/
If you have any other questions or encounter any issues, please feel free to contact our support team at https://sqlbak.com/support.
Great compilation with good examples.
A question regarding %ERRORLEVEL%: Even when I try to backup a database that is offline or not allowed to be backed up (e.g., tempdb), the ERRORLEVEL query always returns 0.
So, I cannot be certain whether the backup was successful or not.
Is there a reliable method for this?
Hello Bruno Klaus,
You can enhance the script by adding a file existence check after executing the command, like this:
:: Check if the backup file really existsif not exist "%BACKUP_FILE%" (
echo Backup file was not created.
eventcreate /T ERROR /L APPLICATION /ID 101 /D "SQL Server backup file was not created."
goto end
)
thanks for the wonderful explanation , and how to update the existing backup file when u do any update on the tables within the database
Fancy not having explicit move_data, move_log. Extra work to discovery the original locations and they are in the .bak data.
Thanks, Matthew — good point!
This is a specific aspect of how SQL Server handles backups. If the WITH MOVE clause is not used during the restore operation, the original file paths for the .mdf and .ldf files will be used — as you correctly mentioned, these paths are stored inside the .bak file.
In typical restore scenarios, it’s usually not necessary to inspect the .bak file manually. The main requirement is that the original directories (where the database files were located) still exist. In most cases, this is the default SQL Server data directory created during installation. However, if custom paths were used, those directories must be manually created before restoring, and the SQL Server service account (commonly MSSQLSERVER) must have write permissions to them.
If you’re unsure where the original files were located, you can use the RESTORE FILELISTONLY command to check the paths stored in the .bak file.