If you use Azure Storage to keep your SQLServer backups then you are probably already aware of “Microsoft SQL Server Backup to Microsoft Azure Tool” that allows you to send your backups there. In this post, we will show how it works and why SqlBak does the same thing in a more convenient way.
How to Backup SQL Server to Azure using Microsoft SQL Server Backup to Microsoft Azure Tool
Microsoft SQL Server Backup to Microsoft Azure Tool is a free tool from Microsoft for sending your SQL Server database backups to Azure Storage. To make it work, you need to install it on your computer and create one or more rules according to which this tool will be operating:
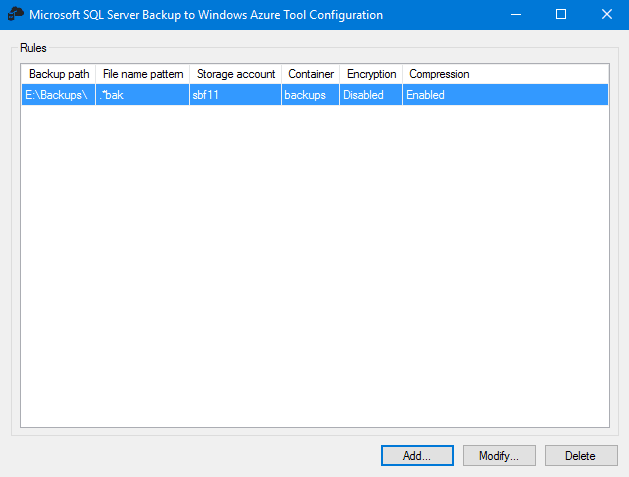
A rule definition consists of three steps where you have to specify:
- Folder to get backups from and file name pattern the backups must match
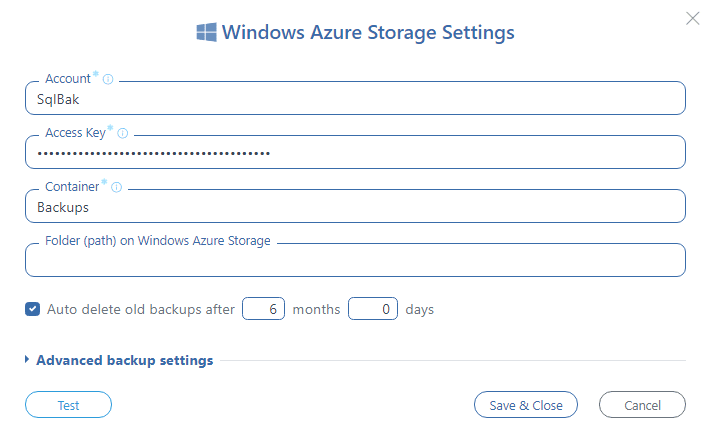
- Windows Azure Storage account and container to upload the backups to
- Encryption and compression settings
After you set up a rule, the tool will be automatically sending backup files to a specified Microsoft Azure container as soon as you create them, for example, using standard T-SQL Command:
BACKUP DATABASE your_database TO DISK = 'full.bak'
But you still have to create the database backups by yourself. This utility is responsible just for sending backups to Azure. There is a lack of automatic backup scheduling, reporting, error notifications, and many other features found in SqlBak.
How to Backup SQL Server to Azure Storage using SqlBak
SqlBak is SAAS that allows you to create and restore SQL Server backups right from your browser. First, install a SqlBak app on your SQL Server and connect it to your account on SqlBak.com. Then you will be able to create backup jobs and make all necessary configurations from any place where you have Internet access.
It takes just a couple of minutes to create a SqlBak backup job. You can learn how to do it in this article or by watching this video. During the backup job setup, you can choose multiple places where your backups will be stored, it can be local or network folder, FTP, Dropbox, Google Drive, OneDrive, Amazon S3, or Azure Storage.
To start sending your backups to Azure Storage you need to accomplish several simple steps:
- Select the databases you need to backup
- Choose a place where your backups will be stored
- Set a backup schedule
Optionally, you can enable additional features like compression, encryption, folder backup, email notifications, custom scripts, and more. But one of the most useful features of SqlBak is backup scheduling that allows creating backups automatically according to your schedule.
Moreover, you can restore any created backups right from SqlBak’s web interface. It will be automatically downloaded from Azure and restored on your server.
Bottom Line
Both applications allow you to send your SQL Server database backups to Windows Azure Storage. But as a simple utility, Microsoft SQL Server Backup to Microsoft Azure Tool only sends your files to Azure leaving the job of backup creation to you. SqlBak being a full-featured database backup service will do everything for you: backup your database automatically, send the backups to Azure, notify you if something goes wrong, and even restore backups back to your server upon request.