The solutions described in this blog post work for any Linux distribution: Ubuntu, Red Hat, Open SUSE, CentOS, Debian, Oracle Linux etcю However, the package installation commands may differ.
The automatic backup of MySQL Server databases is very important for preventing data loss. In order to properly automate backups, you must follow the following steps:
- Create a database backup
- Zip the backup
- Encrypt the compressed file
- Send the backup to Internet storage using FTP, Dropbox, AWS, Google Drive, etc.
- Receive email notification concerning backup results
- Create a backup schedule
- Delete old backups
This article will consider the following ways of carrying out these steps:
Bash script
In most cases, a bash script is a good solution. However, not all storage locations allow you to upload files using shell commands. However, if all that you want to do is save backups to a directory, then you can accomplish this using a simple script.
To set up this solution, we need to install postfix mailutils. In Ubuntu we can do this as follows:
sudo apt-get update
sudo apt-get install postfix mailutils
# Backup storage directory
backupfolder=/var/backups

# Notification email address
recipient_email=<username@mail.com>

# MySQL user
user=<user_name>

# MySQL password
password=<password>

# Number of days to store the backup
keep_day=30

sqlfile=$backupfolder/all-database-$(date +%d-%m-%Y_%H-%M-%S).sql
zipfile=$backupfolder/all-database-$(date +%d-%m-%Y_%H-%M-%S).zip

# Create a backup
sudo mysqldump -u $user -p$password --all-databases > $sqlfile

if [ $? == 0 ]; then
  echo 'Sql dump created'
else
  echo 'mysqldump return non-zero code' | mailx -s 'No backup was created!' $recipient_email
  exit
fi

# Compress backup
zip $zipfile $sqlfile
if [ $? == 0 ]; then
  echo 'The backup was successfully compressed'
else
  echo 'Error compressing backup' | mailx -s 'Backup was not created!' $recipient_email
  exit
fi
rm $sqlfile
echo $zipfile | mailx -s 'Backup was successfully created' $recipient_email

# Delete old backups
find $backupfolder -mtime +$keep_day -delete
Cron allows you to schedule this script to run regularly. In order to facilitate this, do as follows:
sudo crontab -e
Then, add the script path to the end of the string
30 22 * * * /home/user/script/mysql_backup.sh
Thereafter, your script will be executed every day at 10:30 PM.
Summary
Creating a bash script is a good and simple solution if you know bash and how to support it. However, this solution also entails certain disadvantages. You will find that it is difficult to configure the saving of backups to Google Drive or DropBox. Cloud storage rarely supports the CLI interface. In addition, it can be a daunting task to implement the automatic removal of old backups.
Advantages:
- Ideally, you can customize a solution that takes all of your specific requirements into account
Disadvantages:
- If you want to create a more complicated solution, you need to have advanced knowledge of how to write bash scripts
- It’s difficult to configure the sending of backups to the cloud
AutoMySQLbackup
AutoMySQLBackup is a command-line utility that is distributed under the GNU license. This utility allows you to automate the backup process for the MySQL database, and it also allows you to perform incremental backups.
Installation
sudo apt-get install automysqlbackup
If your Linux distribution is RPM-based, the setup process will be a little bit more involved.
- Download the latest version of AutoMySQLBackup
wget https://github.com/sixhop/AutoMySQLBackup/archive/master.zip
- Create a directory and unzip the downloaded archive
mkdir /opt/automysqlbackup
mv AutoMySQLBackup-master.zip
cd /opt/automysqlbackup
tar -zxvf AutoMySQLBackup-master.zip
- Then install AutoMySQLBackup
./install.sh
AutoMySQLBackup Settings
To configure AutoMySQLBackup, you must edit the file automysqlbackup.conf:
sudo nano /etc/automysqlbackup/automysqlbackup.conf
AutoMySQLBackup contains many settings, and you can find the full list in the official documentation.
Please note the following:
- Path to the configuration file
CONFIG_configfile="/etc/automysqlbackup/automysqlbackup.conf"
- Path to the backup storage directory
CONFIG_backup_dir='/var/backup/db'
- Information for connecting to MySQL
CONFIG_mysql_dump_username='root'
CONFIG_mysql_dump_password='my_password'
CONFIG_mysql_dump_host='localhost'
- List of databases that you need or do not need to back up
CONFIG_db_names=('my_db') CONFIG_db_exclude=('information_schema') - Email notification address
CONFIG_mail_address='mail@google.com'
- Options for scheduling
CONFIG_rotation_daily=6
CONFIG_rotation_weekly=35
CONFIG_rotation_monthly=150
- Running the bash script after backup
POSTBACKUP="/etc/mysql-backup-post"
If you plan to store backups for a limited number of days, then you can delete backups by configuring the POSTBACKUP script as follows:# Delete backups that are older than 30 days find /var/backup/db -mtime +30 -delete
By default, AutoMySQLBackup will compress the files using “gzip.” You can change this by editing the CONFIG_mysql_dump_compression parameter. If you want to add encryption, then use the CONFIG_encrypt and CONFIG_encrypt_password parameters.
Running
automysqlbackup /etc/automysqlbackup/automysqlbackup.conf
Summary
This solution can be a good alternative if you are not a bash power user and want a simple solution for backing up MySQL databases to a folder. One particularly notable feature is the ability to create incremental backups. The disadvantages of this solution include lack of support for integrated FTP and cloud storage locations. Even if you just want to upload to FTP, you need to write a separate bash script.
Advantages:
- Built-in incremental backups
Disadvantages:
- You may only specify a folder as the backup storage location
- No integrated solution for removing old backups
SqlBak
SqlBak is a cloud backup service. This is a service that provides you with a wide range of options to automatically back up your MySQL database. The process of creating a backup in SqlBak may include not only creating, compressing, encrypting, and sending data to cloud storage locations, but also sending notifications and running a restore to another computer.
This service allows you to create not only MySQL backups, but also ones for PostgreSQL and MS SQL Server databases.
Installation and Registration
You can install the app using the standard package managers that come with your operating system. You can find the package installation and registration instructions for your OS here.
The installation of the SqlBak app on Linux is very simple, more details on how to do it can be found here.
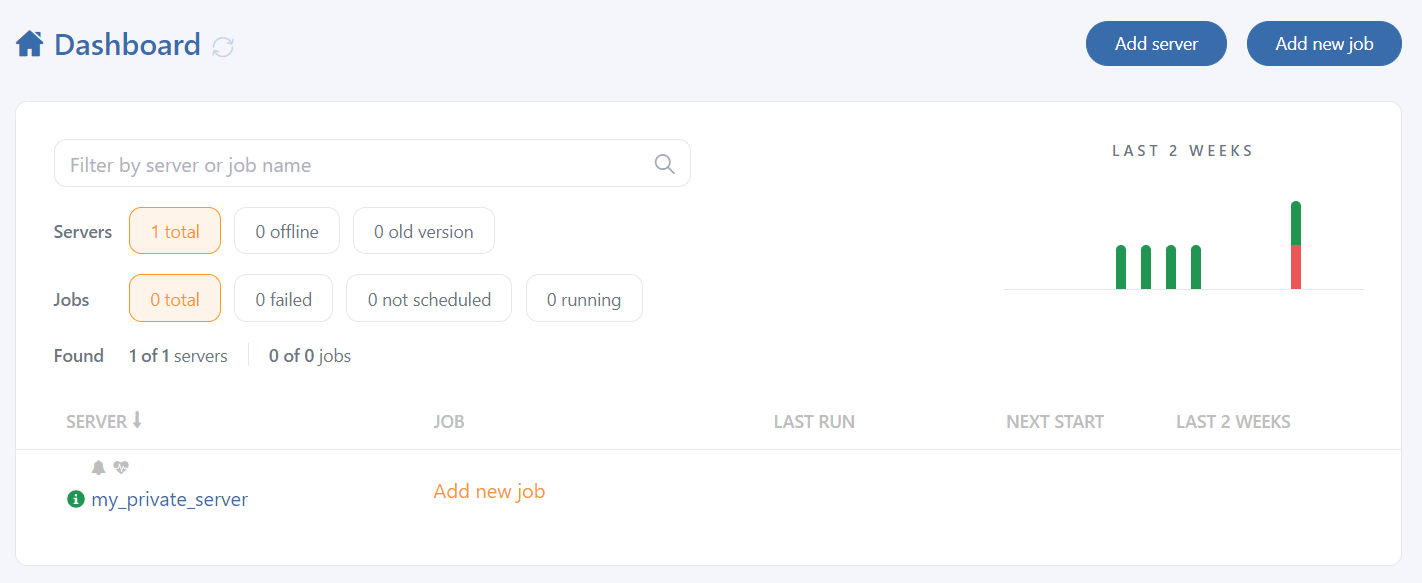
After registration, your server will appear on the Dashboard page.
sudo sqlbak --add-connection --db-type=mysql --user=root

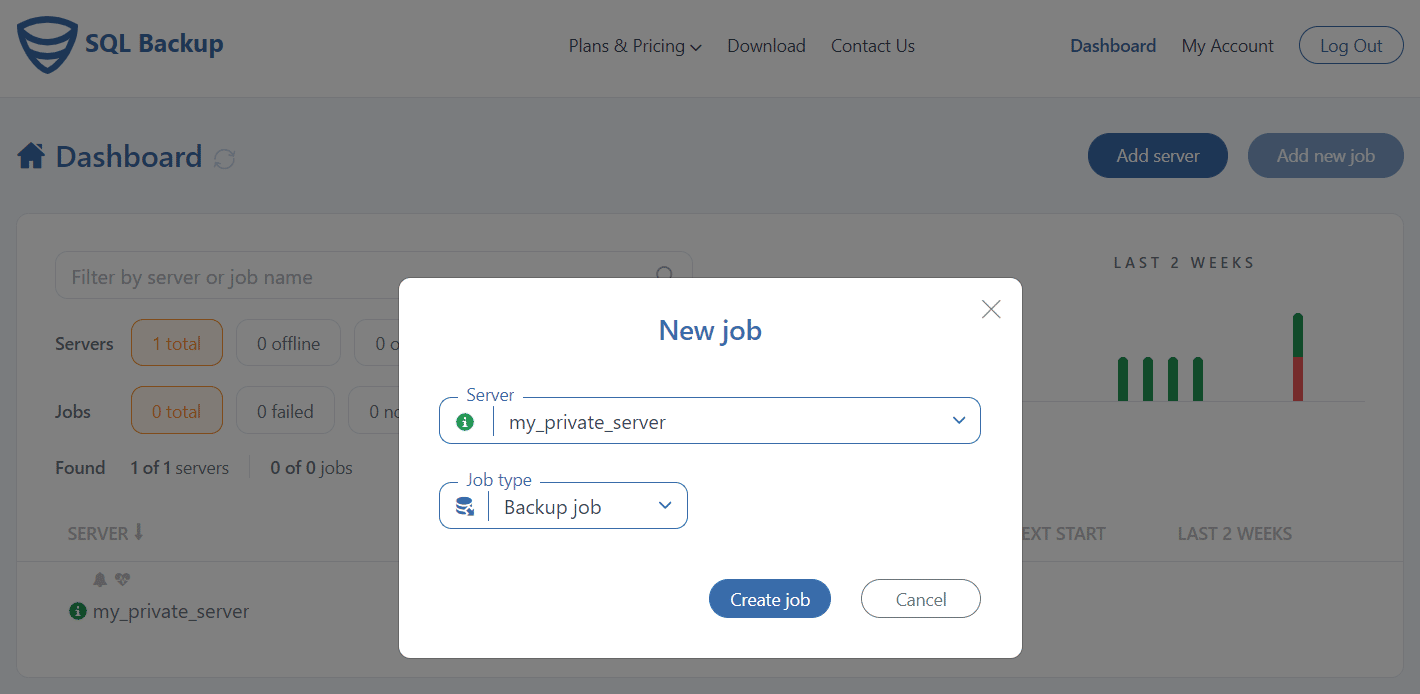
Now you can create a backup job. This can be done by clicking “Add new job” and then “Create job.”
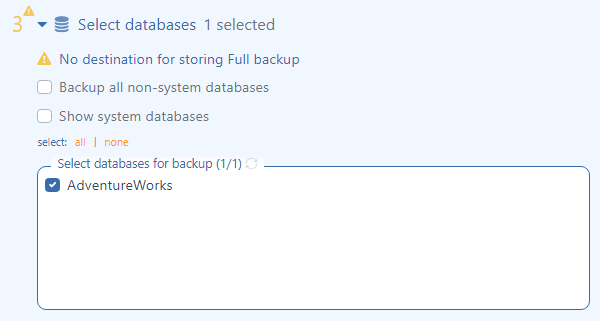
In the “Select databases” section, you can select the databases that you want to back up.
Then, in the “Store backups in destinations” section, you can choose where to send files. You can choose Folder, FTP, Amazon S3, Google Drive, Dropbox, Azure Blob Storage, or OneDrive. Note: You can select several destinations at once, such as a Folder and Amazon S3.

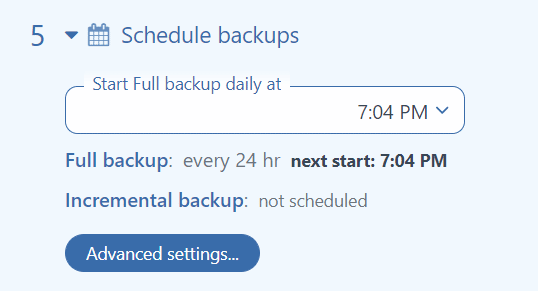
In the Schedule backups section, you can specify the time when to run backup jobs each day. You can change the interval and specify other launch rules in Advanced settings.
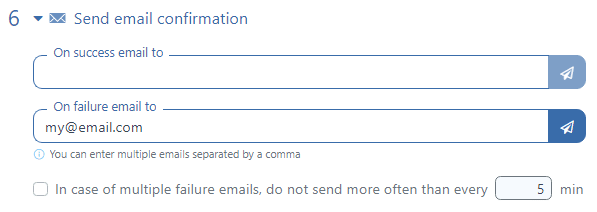
In the Send email confirmation section, you can click on the “Test” button to test the sending of email notifications to the entered email address.
On the backup job settings page, you can find a host of other interesting settings, such as Execute After & Before Scripts, Encryption, and Backup Folder.
The Restore Tasks section deserves special attention. This section allows you to restore a newly created file to another database (for example, to the development server).
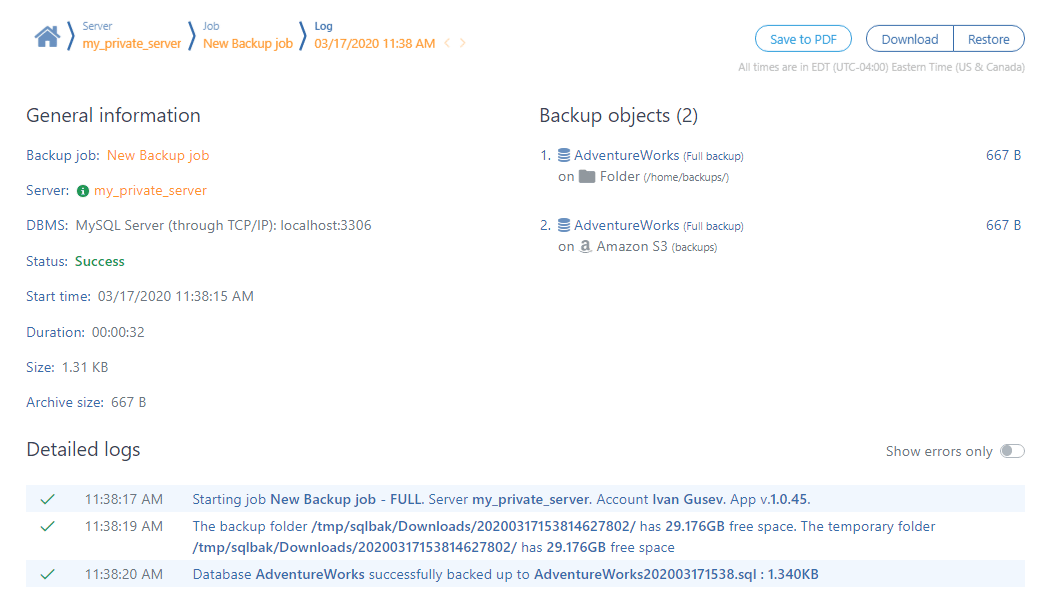
When you click the “Run Now” button, it will immediately run the job and display the job execution log.
Summary:
SqlBak provides a wide range of options for automating MySQL backups. One distinctive feature of this solution is its ease of configuration and support. It also allows you to centrally manage backups for multiple servers. This solution not only automates the download of backups to various cloud storage locations, but also automates the removal of old backups.
Advantages:
- Easy to use and maintain
- Able to send backups to cloud storage
- Able to automatically restore databases
- Able to back up folders along with databases
- Automated deletion of old backups
Disadvantages:
- Cannot be used without a web browser
- Requires an internet connection
Hello…. Is it safe to do this backup every 12 o’clock at night or when data processing is running?
Hello Faz,
We recommend that you reach out to your Database Administrator (DBA) to discuss the most suitable backup schedule for your database