Problem
The BACKUP DATABASE command syntax allows performing backups by specifying a drive, a network folder or Azure storage as the destination. Although it is not possible to set an Amazon S3 bucket as a backup save point, you can transfer the file to S3 using a batch script or a third-party utility.
Presetting
To transfer backups to AWS S3, you need to create access keys that will have privileges to write files to the bucket. More details about creating access keys are available here.
.bat script
Any task that can be performed through the user interface can also be performed using operating system batch scripts. To create a script, we need two utilities.
sqlcmd is a utility that allows you to execute SQL queries to SQL Server from the command line. It is installed automatically along with the SQL server; details are available here.
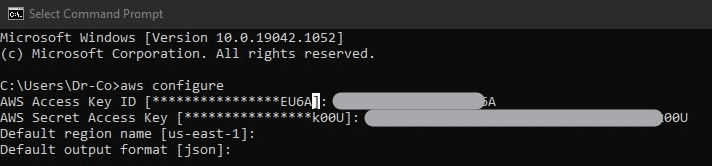
AWS is a utility that allows you to interact with Amazon Web Services from the command line. You can download it here. After installation, you will need to run the AWS configure command and specify the access keys:
AWS configure
Below is a simple script to backup a SQL Server database to Amazon S3:
rem backup file name formation
set day=%date:~7,2%
set month=%date:~4,2%
set year=%date:~-4%
set backup_name=%day%_%month%_%year%.bak

rem Creating a database backup
sqlcmd -Q "BACKUP DATABASE [AdventureWorks] TO DISK = N'W:\temp\%backup_name%.bak' WITH COMPRESSION"
if %ERRORLEVEL% neq 0 exit /b %ERRORLEVEL%

rem Transferring backup file to aws s3 bucket
aws s3 cp W:\temp\%backup_name%.bak s3://my-backet-name/%backup_name%.bak
if %ERRORLEVEL% neq 0 exit /b %ERRORLEVEL%

rem deleting a local copy of the backup file
del W:\temp\%backup_name%.bak
Save this file with the .batextension. For example, to c:\Scripts\sql-backup-to-s3.bat, and then run it to check if it works.
The script generates the backup file name based on the current date, then creates a backup file using the sqlcmdutility, and, because of the COMPRESSION option, will compress it on the go. Then, using the AWS cp command, it will transfer the backup to the S3 storage and then delete the local copy of the backup file.
How to schedule a regular backup script run on Windows
Linux has a crontab that allows you to schedule tasks. Windows has the windows scheduler that can do it.
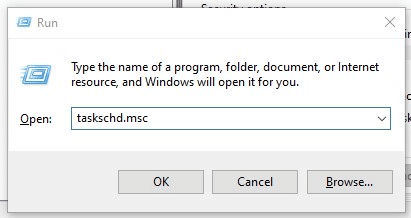
To open windows scheduler, press win + r and enter taskschd.msc
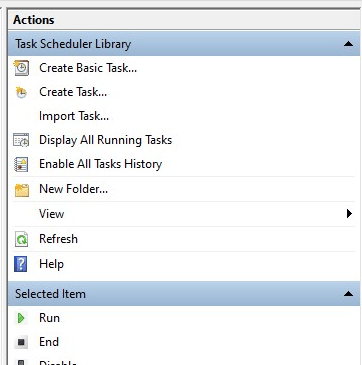
 Click ok and then select Create Basic Task in the new window.
Follow the steps of the wizard:
- Specify a name, such as Backup Database
- In the Trigger section, select Daily. Then specify the time. Night is the best time for backups.
- In the Action section, select Start a Program and then set the path to the previously created script.
To check that everything is configured correctly, select the created task and click Run.
Getting rid of old backups on AWS S3
Your backups are now uploaded to Amazon S3. However, because you pay a monthly fee for storage of each gigabyte on AWS S3, regularly deleting old backups is necessary in order to reduce the costs that you spend on storage.
There are two ways to do this.
- You can set rules for what to do with files older than X days through the storage lifecycle rule. For example, delete them or send them to Amazon S3 Glacier. Details are available here.
- Create a PowerShell script which will delete files older than X days. Below is an example of such a script. Save it under the name c:\scripts\s3-delete-older-backup.ps1 and then add PowerShell “& “”c:\scripts\s3-delete-older-backup.ps1″”” to the end of the script created above.
#setting bucket name
$bucket = "test1-pranas-net"

#setting the date until which backups are considered obsolete
$limit_date = (Get-Date).AddDays(-30)

#raw data list query
$files = aws s3 ls "$($bucket)"

#splitting the date and file name
$parsed = $files | ForEach-Object { @{ date = $_.split(' ')[0] ; fname = $_.split(' ')[-1] } }

#filter files older $limit_date
$filtred = $parsed | Where-Object { ![string]::IsNullOrEmpty($_.date) -and [datetime]::parseexact($_.date, 'yyyy-MM-dd', $null) -le $limit_date }

#delete all filtred files
$filtred | ForEach-Object { aws s3 rm "s3://$($bucket)/$($_.fname)" }
Please note that this script assumes that backup files are stored in the root of the bucket and will delete all files older than a specified number of days.
Cons of this solution
- Unreliability. If the backup script breaks, you may not know about it. Whether it’s a changed database password, a renamed database or a disk write error, all forseeable issues need to be considered.
- Complexity. Changing something down the line in the script can be difficult if you do not have a full understanding of how the script works. If, for example, backups are not appearing in S3, you have to be able to troubleshoot the problem.
Pros of this solution
- Flexibility. If you are good at PowerShell, then by modifying the script, you can provide for any features of your architecture.
- No charge. However, if your backup script is complex, then you will need to spend time on it. And just like any other code, it will require maintenance.
- Complexity. The method described above will be suitable if you have programming skills and are familiar with batch or PowerShell scripts.
Third-party utilities
The need to store backups in the cloud is not something new, and many applications effectively solve this problem.
SQLBackupAndFTP
It is a simple application that focuses on one basic task: making a backup of the database, compressing it, encrypting it, and sending it to the cloud. One of the available savepoints is AWS S3. You can download the application by following this link.
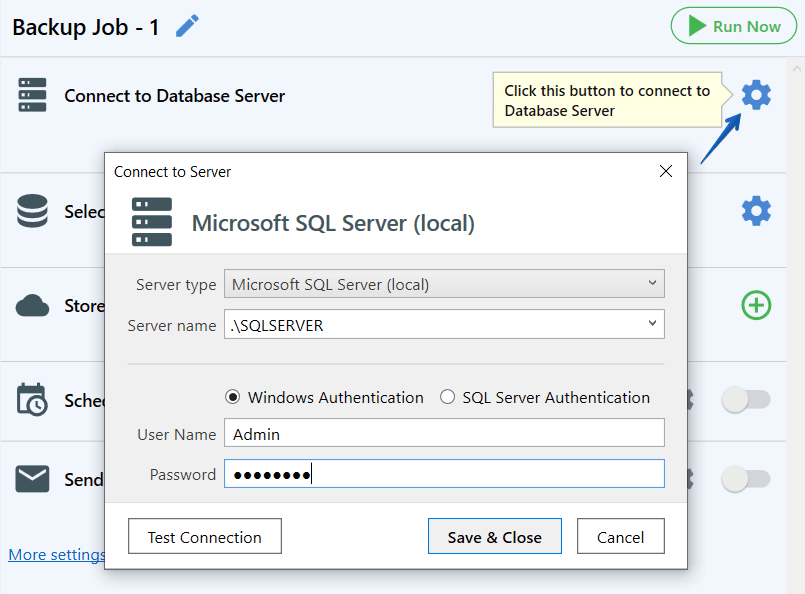
After installing the application, set the connection to your SQL Server. To do it, click on the gear button at the “Connect to Database Server,” choose Microsoft SQL Server (local) as your server type, specify your server’s name, and add the credentials.
At the next step choose the databases you need to backup.
 Now it’s time to choose Amazon S3 as a place for storing the backups. Click on the plus button at the “Store backups in selected destination” and choose Amazon S3 from the list.
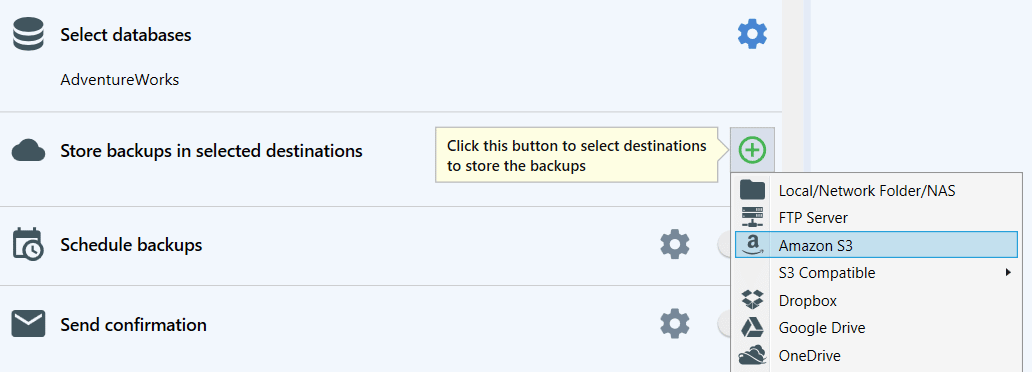
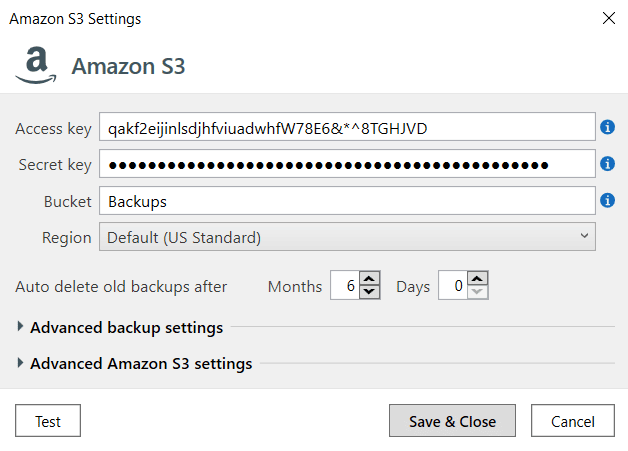
At the opened window add the appropriate settings (specify “Access key,” “Secret Key” and “Bucket”), and test the connection.
To set a backup schedule please enable the “Schedule backups” option. By clicking the gear button you can find the advanced schedule settings.

Now your backups will be run according to the selected schedule and stored in your Amazon S3. Those were the basic settings but you can set email notifications for success or failed backups, encryption and compression for the backups, and many more.
Cons of the solution
- Fee. Most of the features of SqlBackupAndFtp are free to use, but you need to buy a license to use AWS S3 backups. The license fee starts at $39.
Pros of the solution
- Easy to set up. The application is easy to set up. Complex interactions with SQL server API and Amazon S3 are taken care of.
- Job history transparency. Every important action that the application does is reflected in the backup work log. Also, everything that was done as part of the job is reflected in the summary report.
- Easy to recover. Data recovery is just one button away. The application will download the backup for the specified date from the selected location, unpack it and restore it.
SqlBak
This SaaS is for managing backups of SQL Server and other databases. It allows you to manage automated uploading of backups to cloud storage of multiple servers. The service works with both Windows and Linux. You can download it here.
Install the SqlBak app and lunch SqlBak app. Click on the “Add” button and set the connection to your SQL Server.

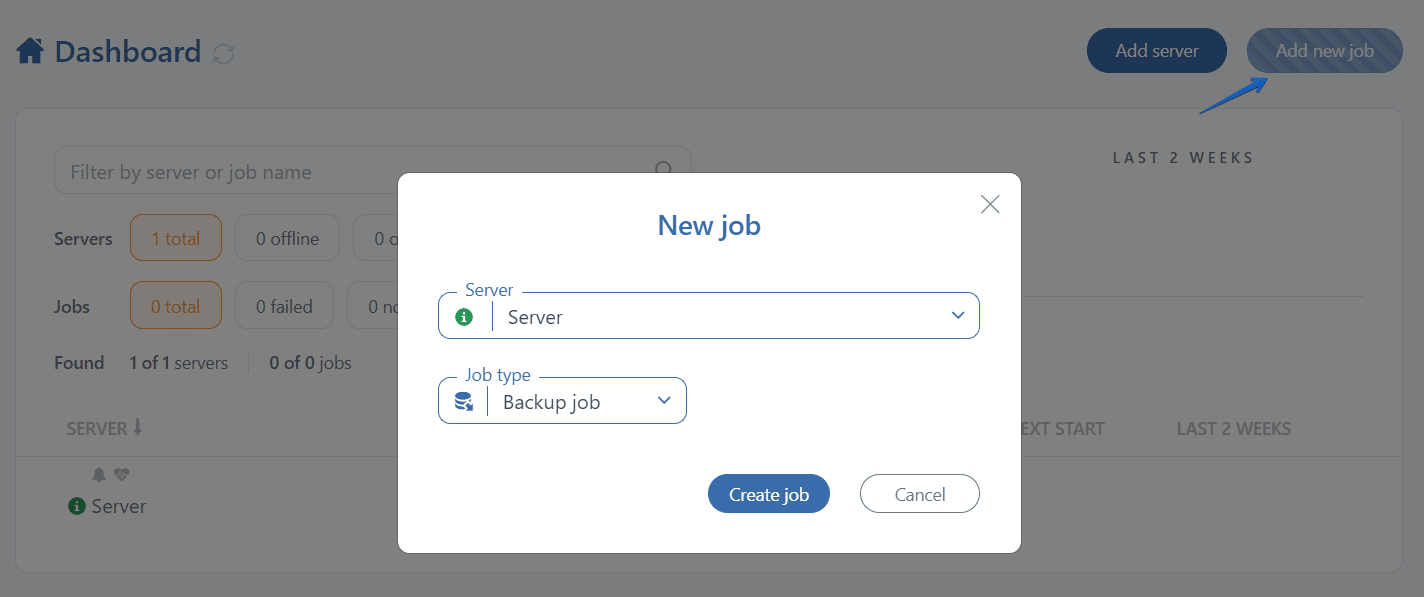
Now you have to create a backup job, to do it go to the “Dashboard” page and click on the “Add new job” button.
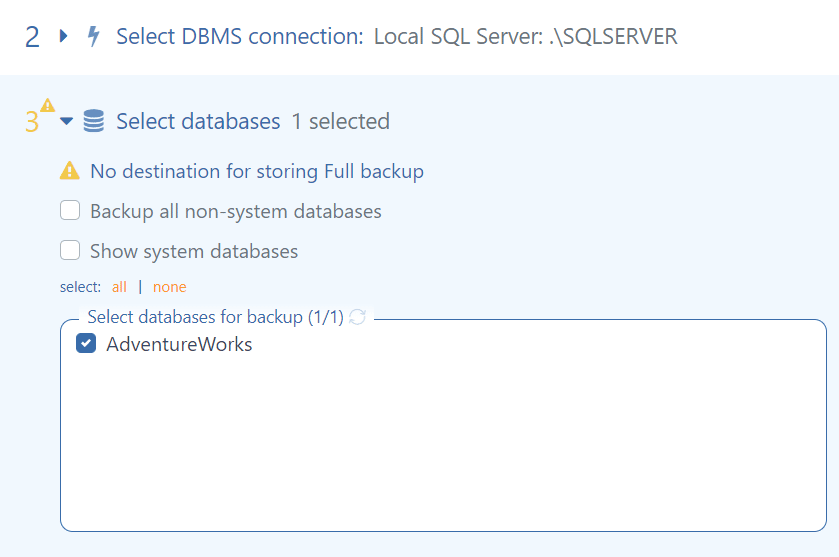
At the opened page scroll down to the “Select databases” section and add the databases you need to backup.
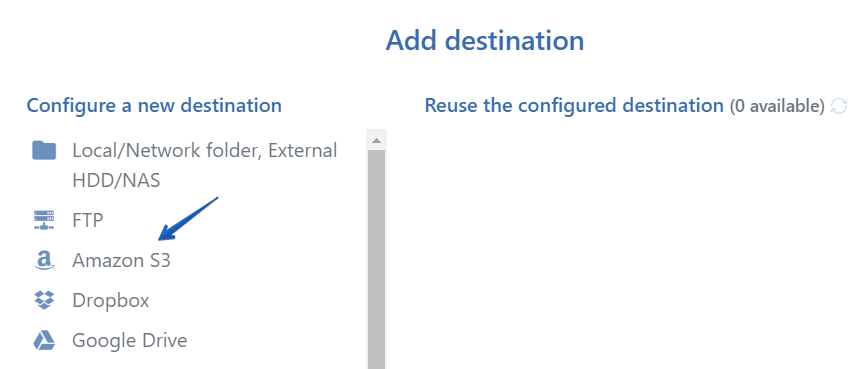
To send the backups to Amazon S3 go to the “Store backups in destinations” section, click on the “Add destination” button, and choose Amazon S3 from the list.
At the opened window specify your “Access key,” “Secret key” and “Bucket.” To save the settings, click on the “Save & Close” button.
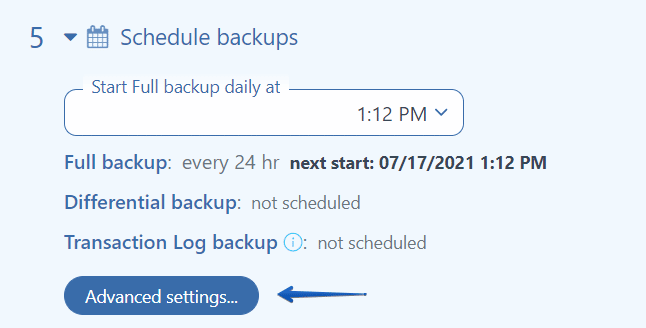
 Scroll down to the “Schedule backups” section and enable that option to set a schedule for your backup job. To find the advanced settings click on the “Advanced settings” button.
 All the necessary backup job settings are done, and your backups will be performed according to the selected schedule. To save the settings click on the “Save & Exit” button.
 You can add additional settings to your backup job like Compression and Encryption, email notifications in case of failure or success, and others.
Cons of the solution
- Monthly fee. The service costs $9 a month.
- It does not work in an isolated network. To use this solution, you need to connect to a global network that is unsuitable for isolated corporate networks.
Pros of the solution
- Centralized management. A single dashboard for managing backups on multiple servers.
- Reliability. The service monitors whether backups are in progress and sends notifications in case of any issues.
- Creating a secondary server. The service allows you to perform an automated restore to another connected server.
Shouldn’t you use -le instead of -ge ?:
#filter files older $limit_date
$filtred = $parsed | Where-Object { ![string]::IsNullOrEmpty($_.date) -and [datetime]::parseexact($_.date, ‘yyyy-MM-dd’, $null) -ge $limit_date }
Hi Nigel,
Thanks for pointing this out, we’ve fixed the issue.
Thank you!