 In this article, we will talk about how to backup query results if you are using a database querying application like SQL Server Management Studio.
We will cover multiple possibilities of backing up your results, from those built-in SSMS (SQL Server Management Studio) to some workarounds we consider to be more efficient.
Continue to read to find out how to achieve this…
There might be situations where you would like to backup the results of only one query instead of the entire contents of one or multiple tables. For those particular situations, we have written an article on how to achieve this.
But before we continue, please take note that if you do backup query results, your data and database schema are not backed up. If you want to backup your entire database, then please follow this article here.
Backup query results
As we said, there are multiple options for achieving this and we will present them to you. For our demonstration, we will use SSMS (SQL Server Management Studio) to write our queries and a test database.
Before continuing we need to make a clear distinction between database schema (table definition and keys) and what occurs when we backup a database and the results displayed by the query. Do not forget that running a SELECT statement does not change the schema of the database, it just displays the data in a customized way, depending on your query.
Your query’s results are not stored anywhere in the database in the exact form as you see them displayed. For this reason, because the result set is dynamic in the sense that it exists only for display purposes and not physically saved, then traditional backup techniques do not work for this scenario. Standard backup techniques have been developed to solely backup the database’s schema and its data.
And because result sets do not have a defined schema for their structure, workarounds have been developed to allow you to backup query results to different file formats.
-
Backup query results to Excel
One of the most popular options for storing customized data from queries is Excel. The reason for this is that many people find it easier to export lesser filtered and formatted data from a database into Excel and then continue processing, filtering or formatting the data in Excel.
So, if you want to backup your query’s result to an Excel file, follow these steps.
In the Object Explorer window, right-click the name of the database that contains the data which you want to back up.
A small wizard will appear to guide you through the process of backing up this data.
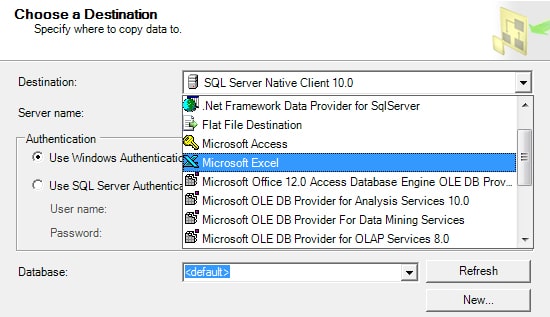
In the first window be sure to select the appropriate Data Source (the database that is used in your query) and hit Next. On this next window, Data Destination, choose Microsoft Excel from the Destination dropdown list.
After selecting Excel, set an export path where this Excel will be saved on your computer. Press Next to go to the next window.
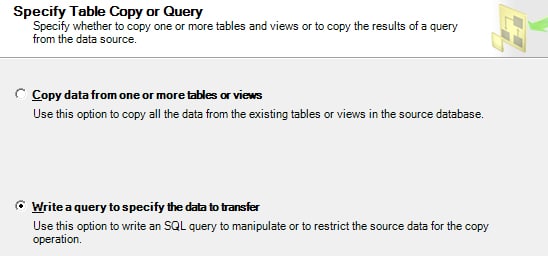
In this window, select the second option, Write a query to specify the data to transfer, which will take you to a screen where you will input your query.
After inputting the query in this window you can press the Parse button to make sure the query is syntactically correct and will not generate errors in the following phases. Press Next to get to the following step.
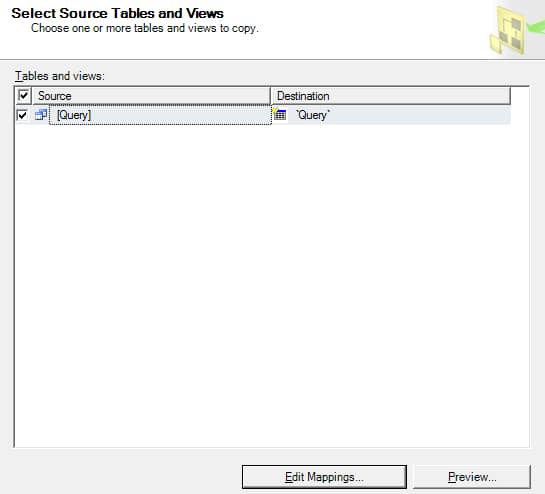
In this following window, you will have two columns. The first column is for the Source of data (your query) and the second column contains the name of the Excel sheet where the data will be exported. If you’re exporting to a new Excel file you can rename this.
At this point, you can press Finish to start the exporting of data into the Excel file, but if you press Next you have options to set up the datatype of the columns and cells where the data will be stored.
-
Backup query results to .rpt file
Backing up result sets into a .rpt file is similar to export, but being a .rpt file it can be later imported into other systems or applications that accept this file type.
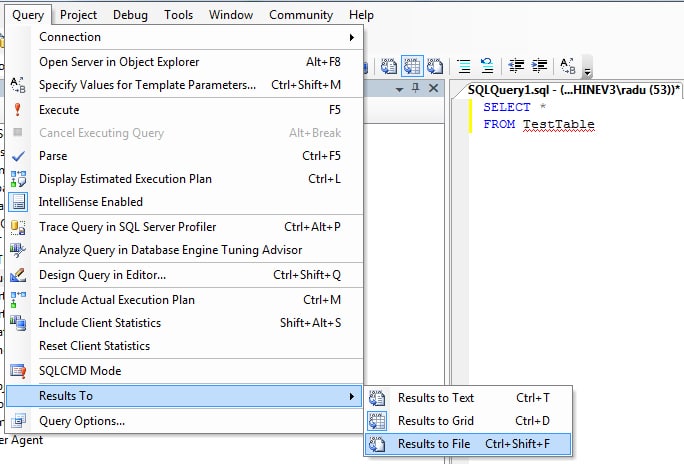
In order to backup your query results to a .rpt file from SSMS, all you have to do is write the query in your query window, then go to the Query menu -> Results to and select Results to File option.
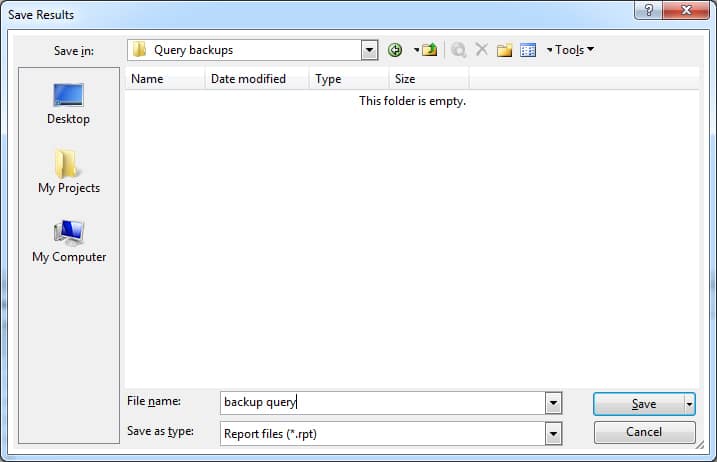
After this, when you run your query, a window will pop up to allow you to specify the file name and location where you want to back up this result.
The export file is similar to a normal text file export, except that it retains the structure of a table so that it is easily readable if you open the file with a program that supports .rpt files.


